Payment Link
Create shareable payment links to collect payments from customers without building a checkout page.
Payment Link lets you collect payments from customers without building a checkout page. Simply create a link, share it with your customer, and they can pay using their preferred payment method.
When to Use Payment Link
- Sending invoices to customers via email or chat
- Collecting payments for services or custom orders
- Receiving payments when you do not have a website
- Creating one-time payment requests
Accessing Payment Link
Navigate to INVOICES > Payment Link from the sidebar.
Creating a Payment Link
Creating a payment link is a two-step process: filling in the Invoice details, then adding Items.
Step 1: Invoice
Click + Create Payment Link to open the Payment Link Generator.
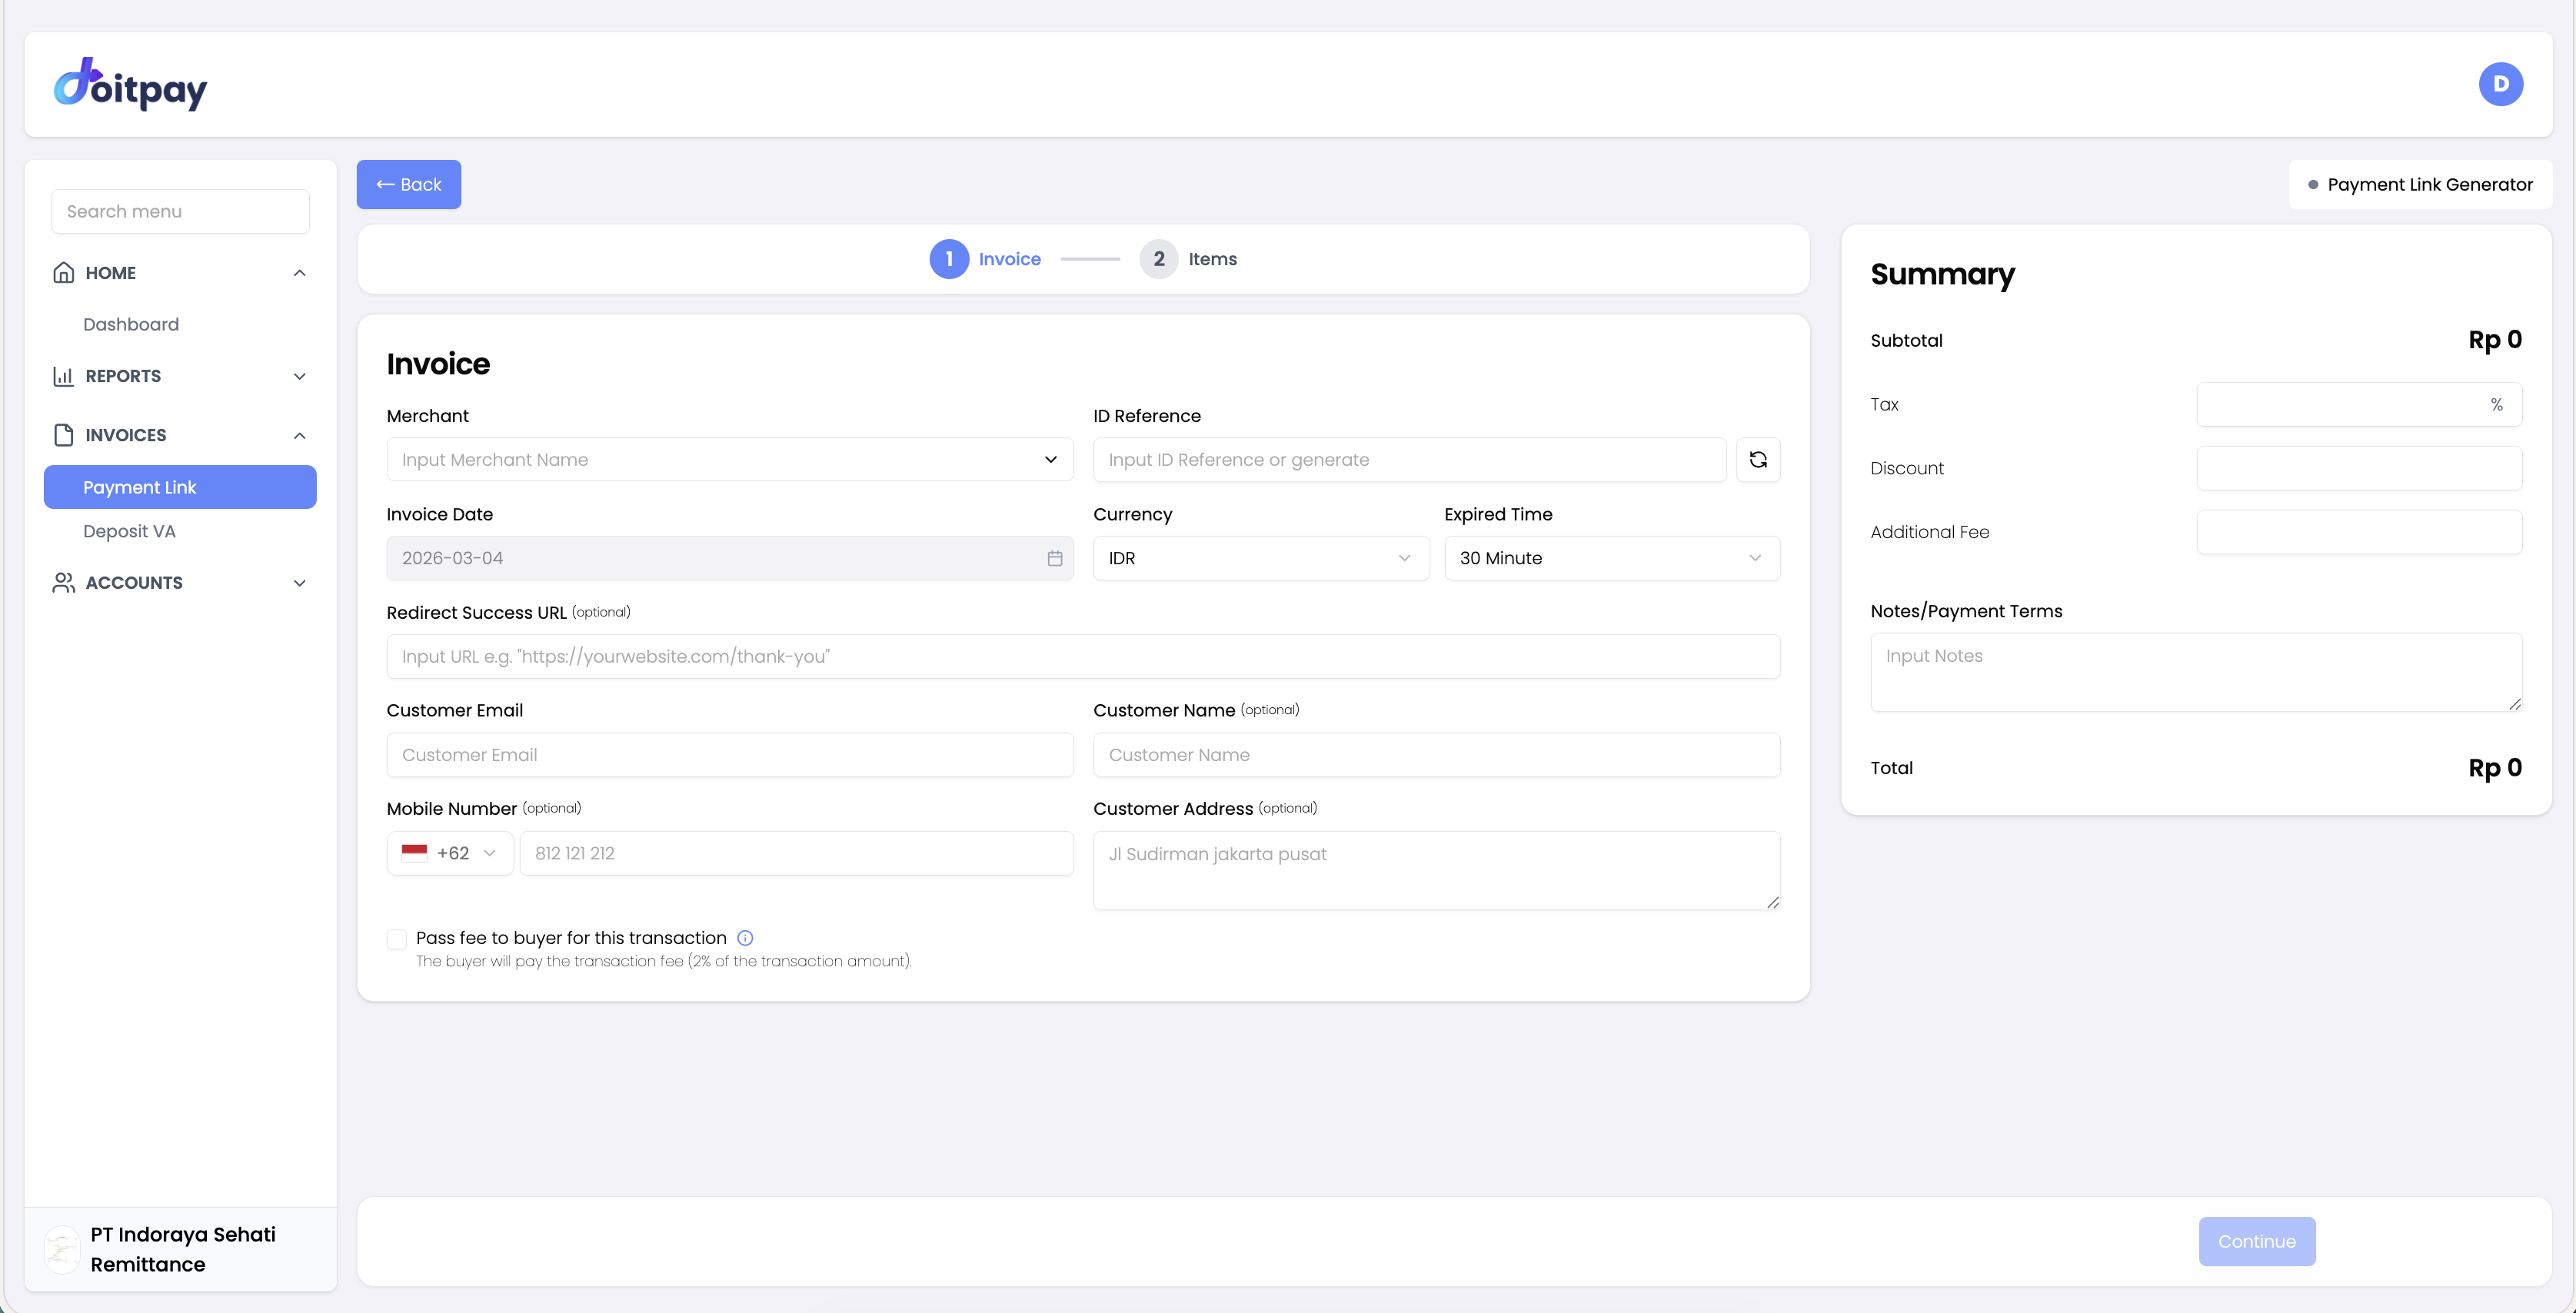
Fill in the following fields:
| Field | Description |
|---|---|
| Merchant | Select which merchant account will receive the payment |
| ID Reference | Enter a reference number or click the generate button to auto-create one |
| Invoice Date | Automatically set to today's date |
| Currency | Select the currency (default: IDR) |
| Expired Time | Set how long the payment link will be valid (e.g., 30 minutes) |
| Redirect Success URL (optional) | URL to redirect the customer after a successful payment |
| Customer Email | Customer's email address for payment notification |
| Customer Name (optional) | Customer's full name |
| Mobile Number (optional) | Customer's phone number (includes country code, e.g., +62) |
| Customer Address (optional) | Customer's address |
The Summary panel on the right shows a live calculation of Subtotal, Tax, Discount, Additional Fee, and Total.
You can enable Pass fee to buyer for this transaction to have the buyer cover the transaction fee.
Once done, click Continue to proceed to Step 2.
Step 2: Items
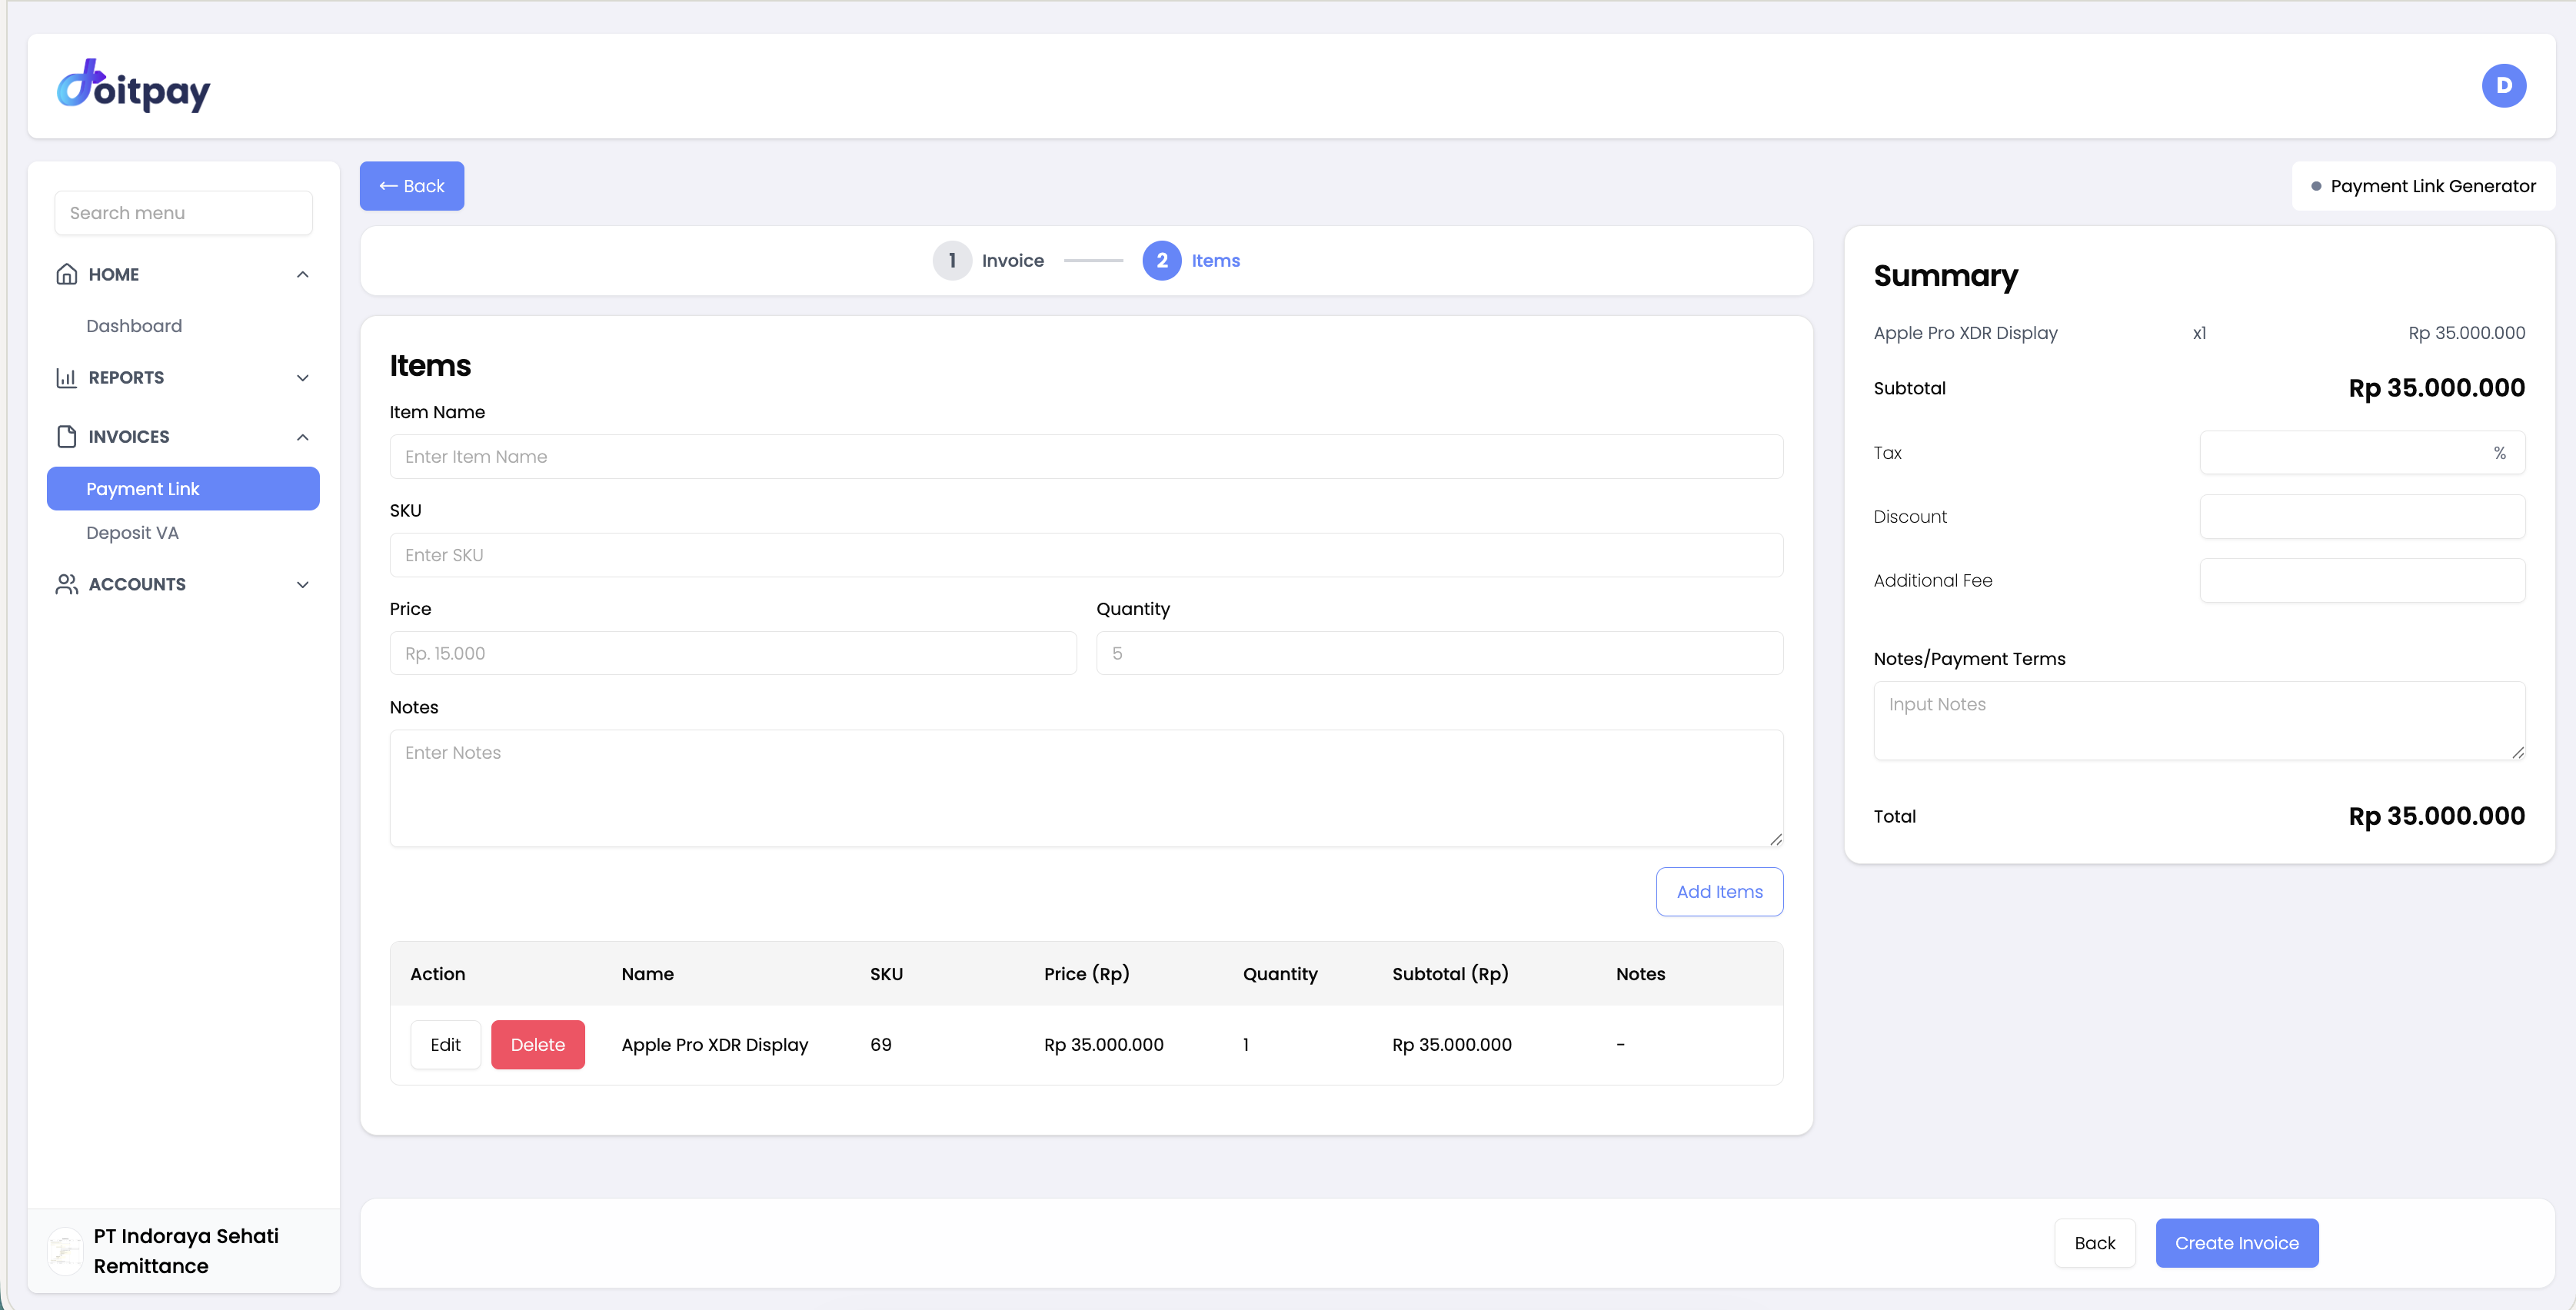
Add one or more items to the invoice:
| Field | Description |
|---|---|
| Item Name | Name of the product or service |
| SKU | Stock keeping unit code |
| Price | Unit price in Rupiah |
| Quantity | Number of units |
| Notes (optional) | Additional notes for this item |
Click Add Items to add the item to the list. You can add multiple items. Each item appears in the items table below, where you can also Edit or Delete them.
Once all items are added, click Create Invoice to generate the payment link. Click Back to return to Step 1 and edit invoice details.
Tip
Use descriptive ID references that help you identify payments later, such as "INV-2026-001" or "ORDER-12345".
Sharing the Payment Link
Once created, you can share the link by:
- Copy Link: Click the Link button to copy the URL to your clipboard
- Email: Paste the link in an email to your customer
- Chat Apps: Share via WhatsApp, Telegram, LINE, or other messaging apps
- SMS: Send the link via text message
Your customer clicks the link, chooses their payment method (VA, QRIS, E-Wallet, etc.), and completes the payment.
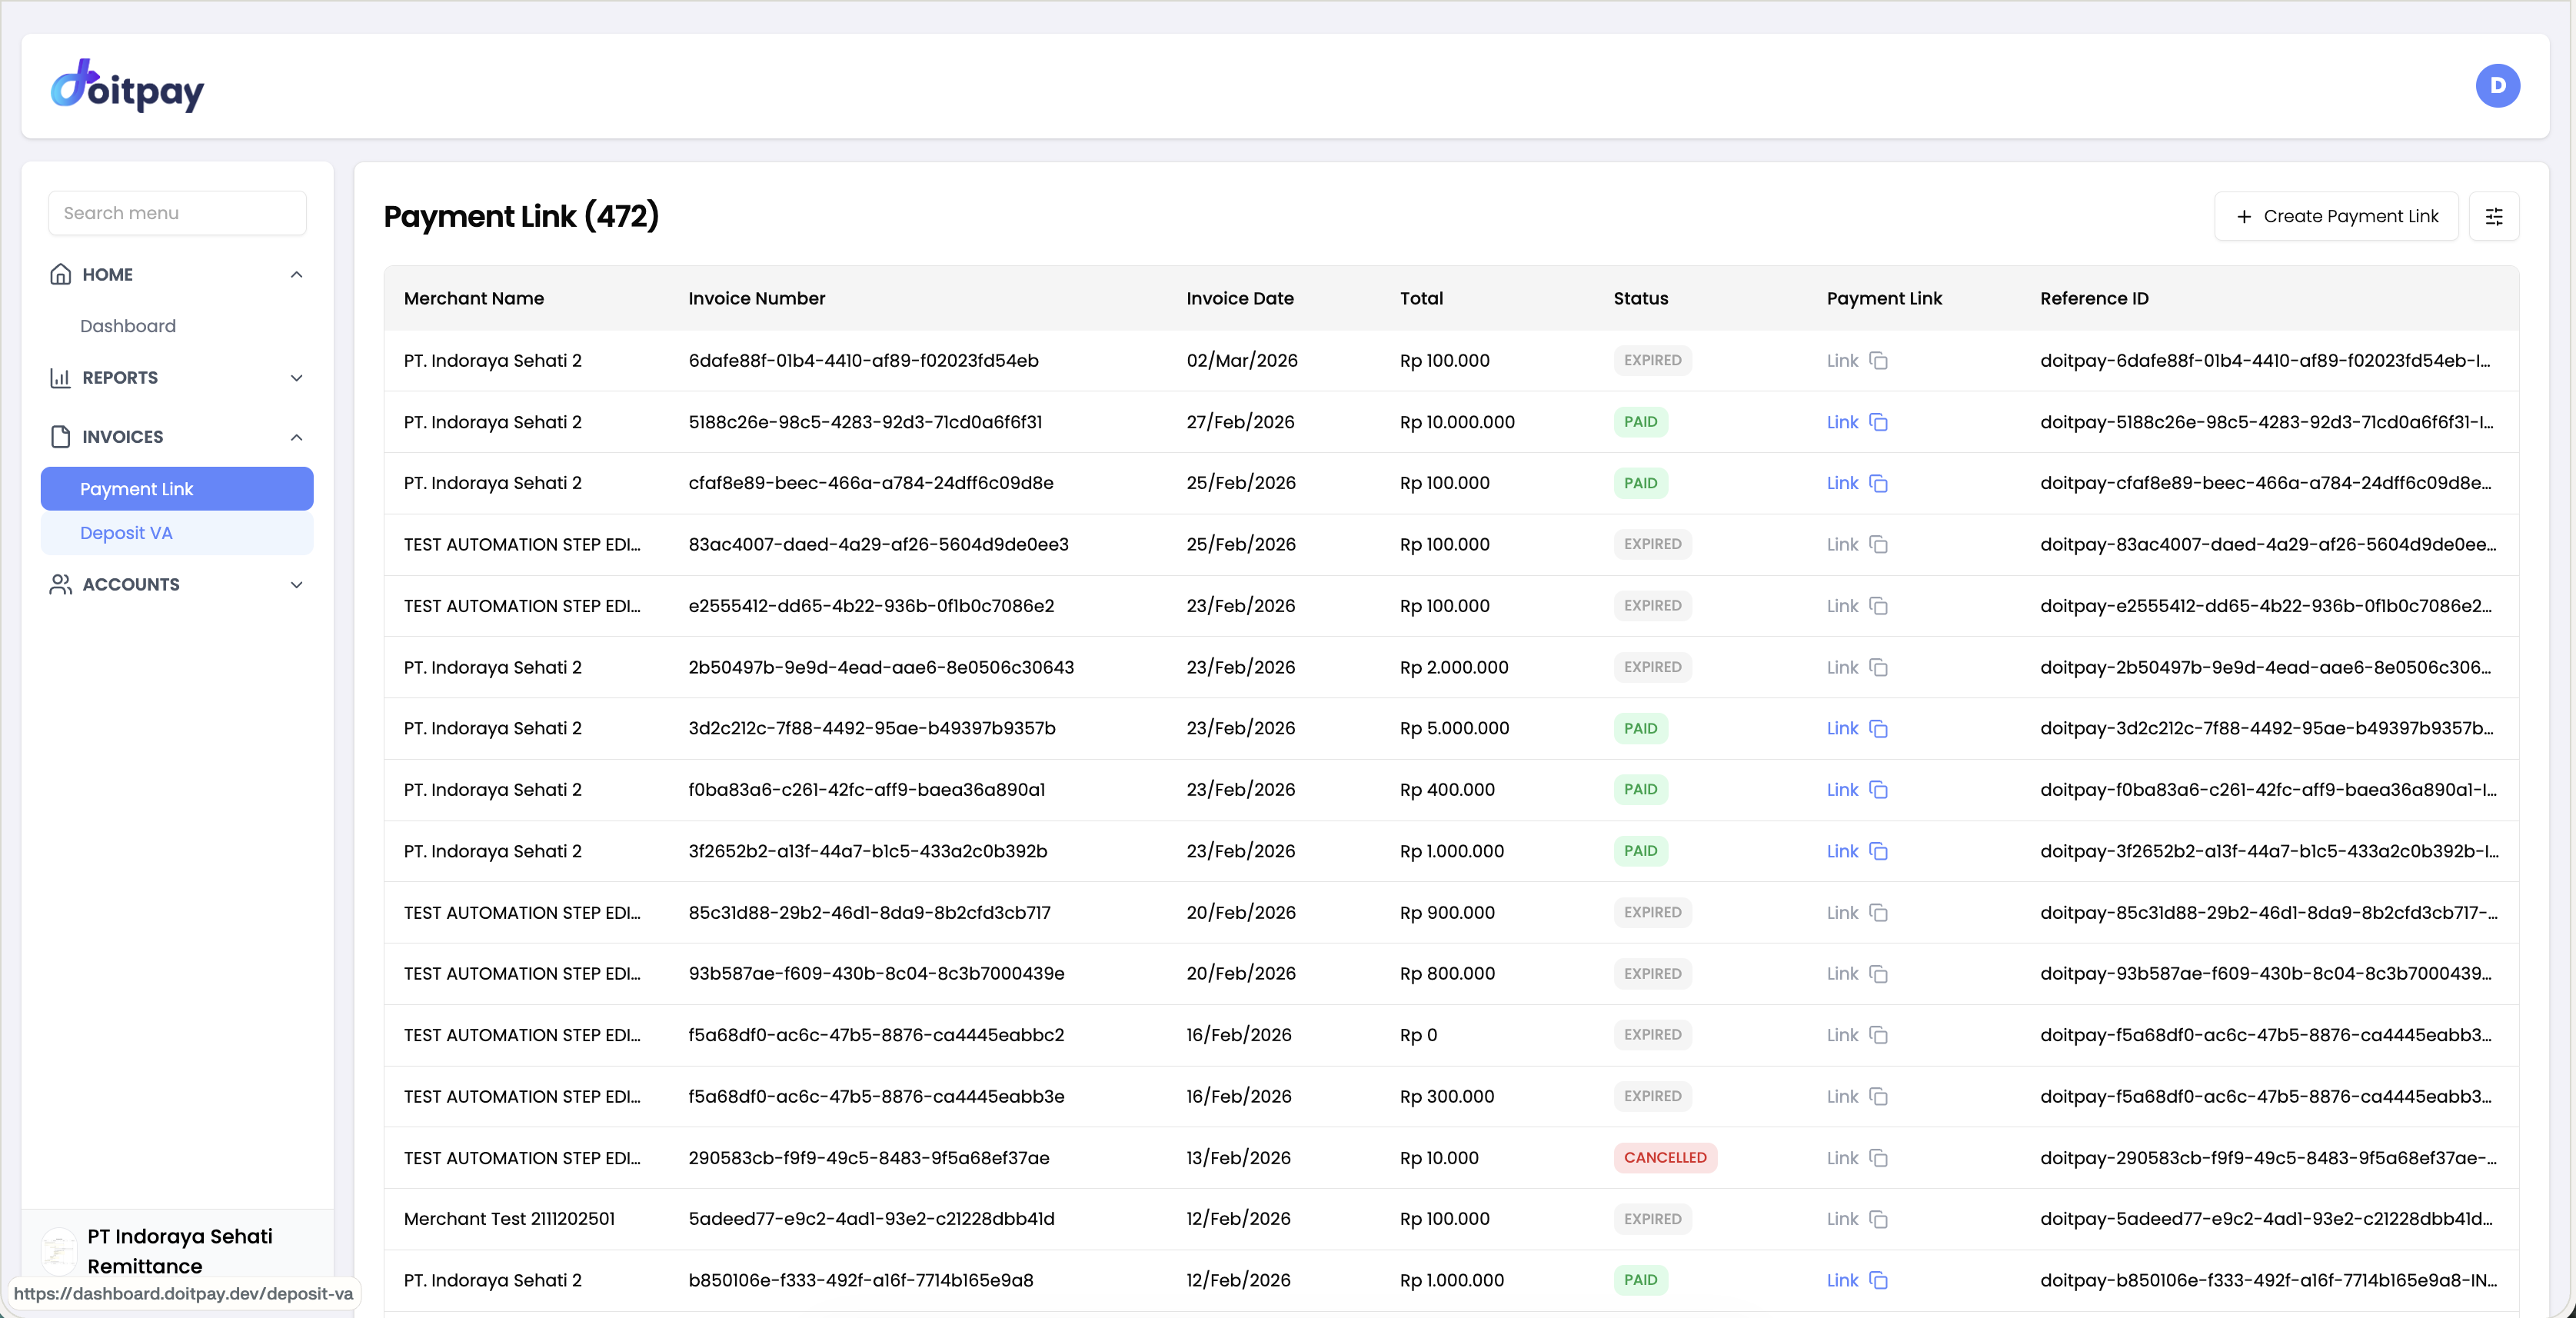
Understanding the Payment Link Table
| Column | Description |
|---|---|
| Merchant Name | Which merchant will receive the payment |
| Invoice Number | Your reference number |
| Invoice Date | When the link was created |
| Total | Payment amount |
| Status | Current state of the payment link |
| Payment Link | Click to copy the shareable URL |
| Reference ID | Doitpay's tracking reference |
Payment Link Status
| Status | Meaning | What to do |
|---|---|---|
| ACTIVE | Link is live, waiting for payment | Share with customer if not done |
| PAID | Customer completed payment | Payment will be settled normally |
| EXPIRED | Link has passed its expiry date | Create a new link if still needed |
| CANCELLED | Link was manually cancelled | Create a new link if still needed |
Managing Payment Links
View All Links
The table shows all payment links with the most recent at the top. Use Page Size to show more records per page.
Find a Specific Link
Use your browser's search function (Ctrl+F or Cmd+F) to find a specific invoice number.
Check Payment Status
Look at the Status column to see if a customer has paid. ACTIVE means still waiting, PAID means completed.
View Invoice Detail
Click Detail on any row to open the full Invoice Detail view.
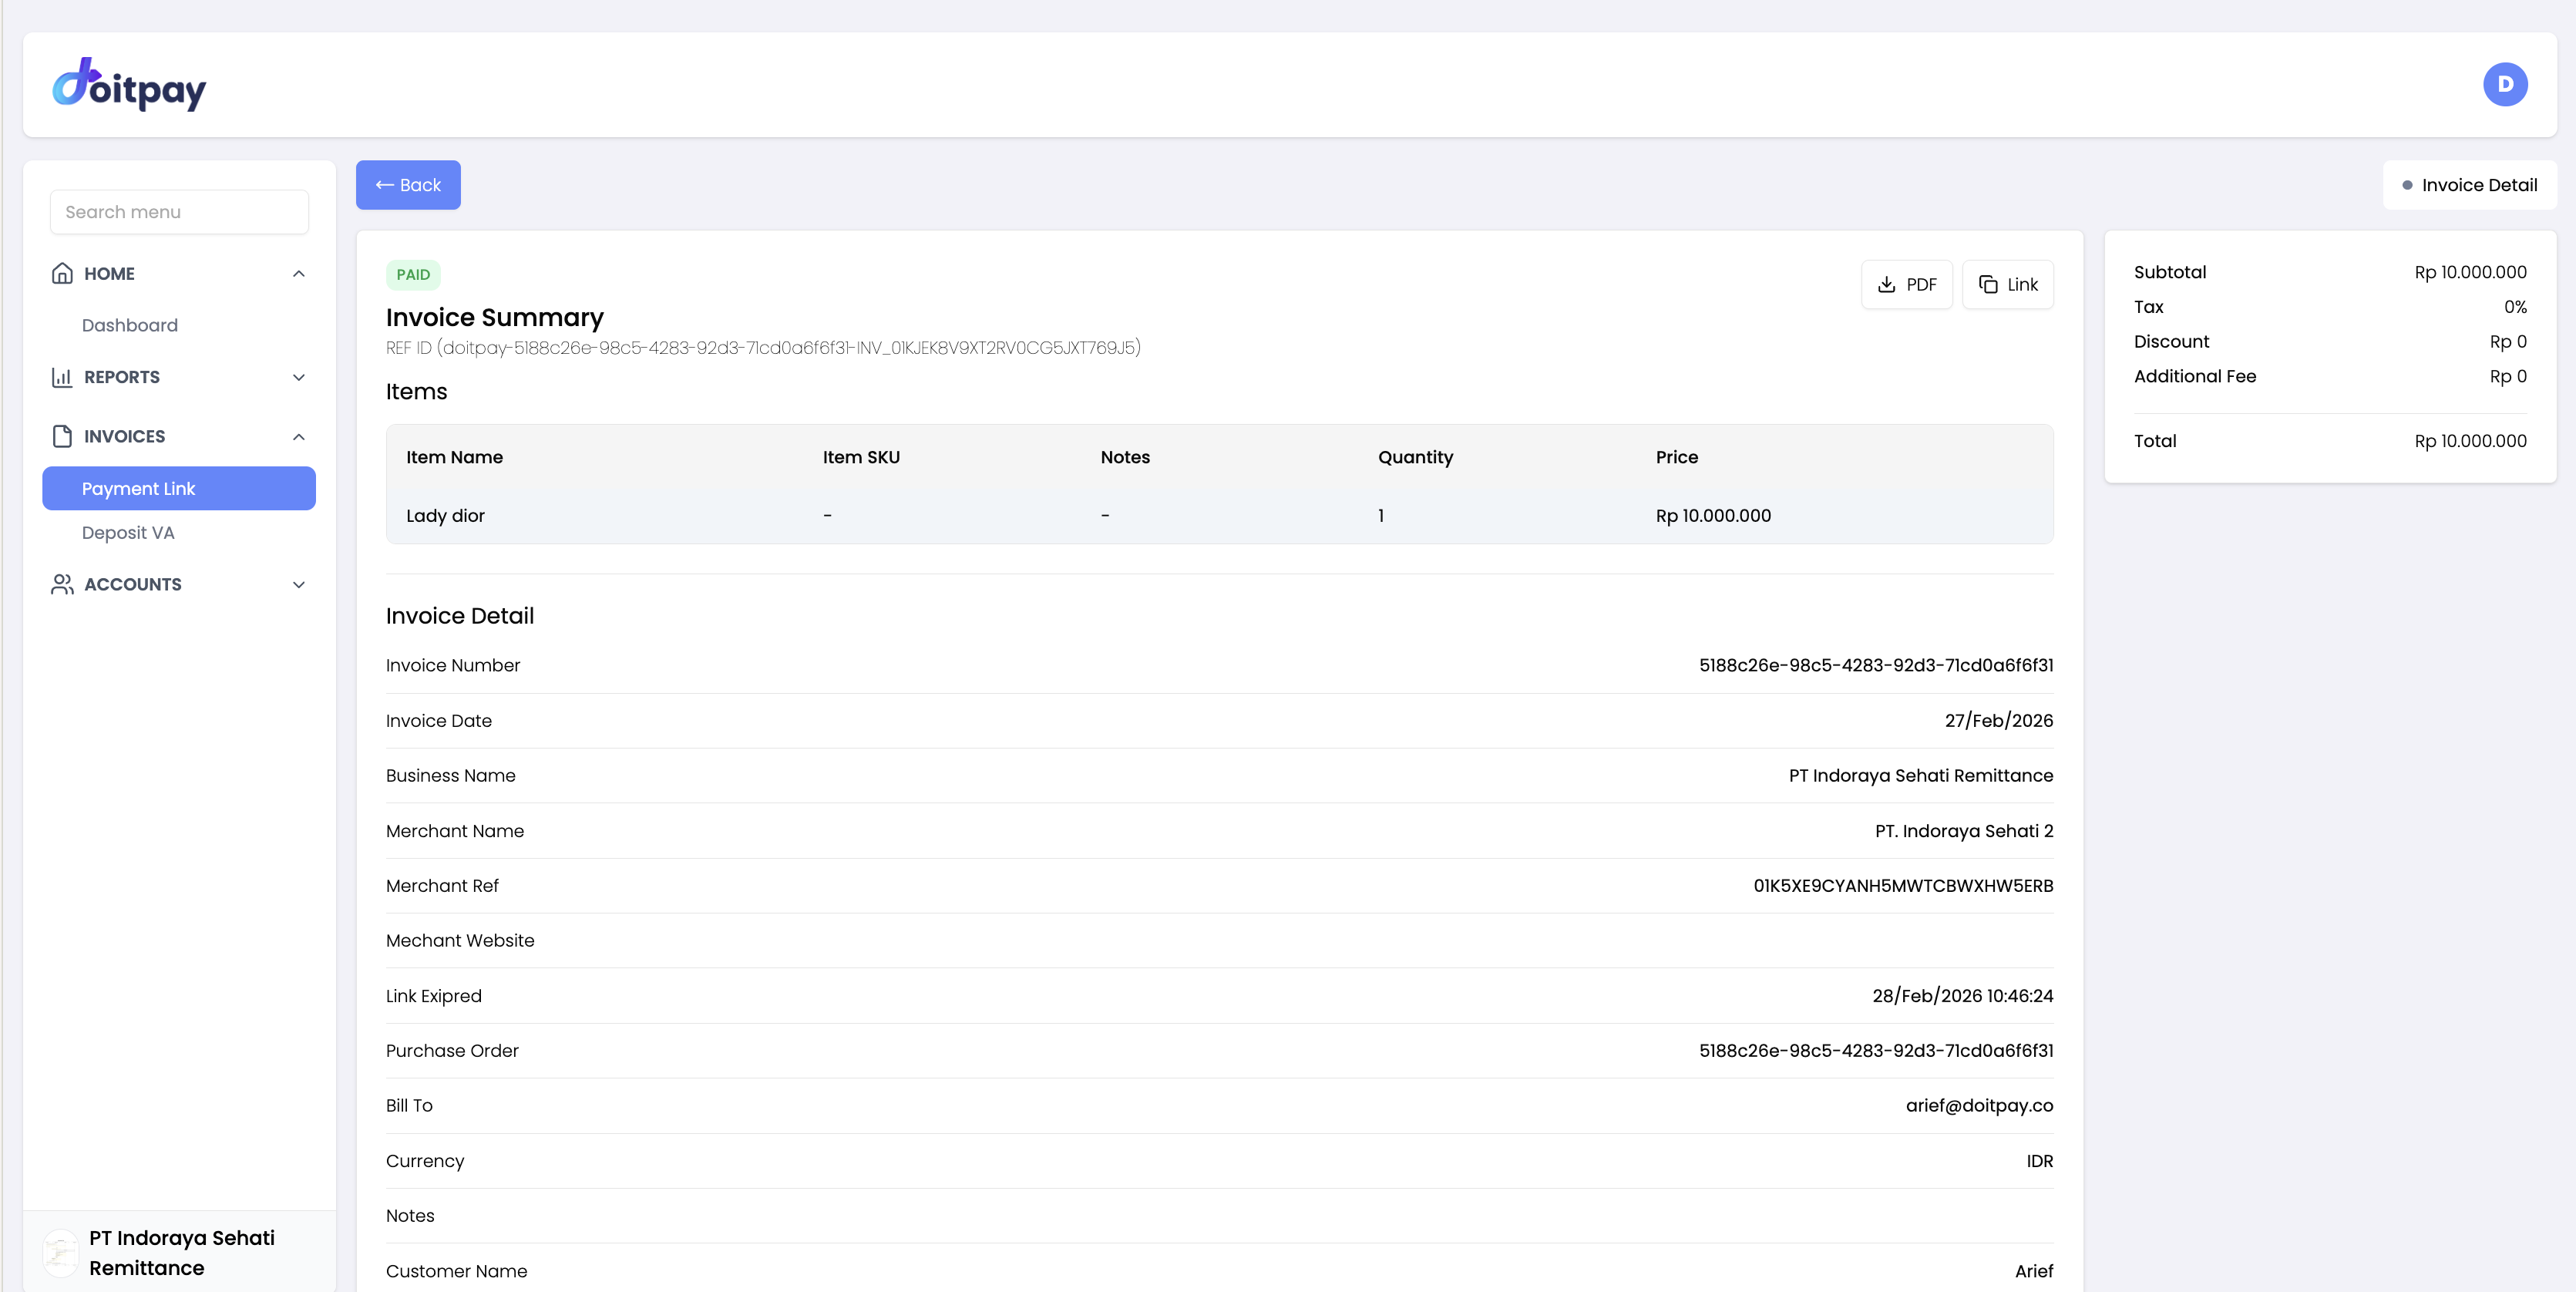
The detail view shows:
- Invoice Summary: Status, REF ID, and a breakdown of all items (Item Name, Item SKU, Notes, Quantity, Price)
- Invoice Detail: Invoice Number, Invoice Date, Business Name, Merchant Name, Merchant Ref, Merchant Website, Link Expired date, Purchase Order, Bill To (customer email), Currency, Notes, and Customer Name
- Summary panel: Subtotal, Tax, Discount, Additional Fee, and Total
You can also download the invoice as a PDF or copy the payment link directly from this page.
What Your Customer Sees
When a customer opens your payment link:
- They see the payment amount and description
- They choose their preferred payment method
- They complete the payment (scan QR, transfer to VA, etc.)
- They receive confirmation when payment succeeds
The entire process is branded and secure, giving your customers confidence in the payment.
Common Questions
Q: How long does a payment link stay active?
By default, links remain active until paid or manually cancelled. You can set a custom expiry when creating the link.
Q: Can I edit a payment link after creating it?
No, payment links cannot be edited once created. If you need to change the amount, cancel the old link and create a new one.
Q: What payment methods can my customer use?
Customers can pay using any payment method enabled on your account (Virtual Account, QRIS, E-Wallet, Credit Card, etc.).
Q: How do I know when a customer pays?
The status will change to PAID in your Payment Link list. You can also see the transaction in your Transaction Reports.
Q: Can I send automatic payment reminders?
This feature is not available in the dashboard. You can manually resend the link to remind customers.
Q: What if a customer pays the wrong amount?
Payment links require the exact amount. If a customer needs to pay a different amount, create a new link with the correct amount.
Best Practices
- Use clear ID references that you can easily search later
- Add item details so customers know what they are paying for
- Set an expiry time for time-sensitive payments
- Check status regularly to follow up with customers who have not paid
- Keep records of which links you send to which customers