Profile & Settings
Manage your personal profile, business information, checkout branding, and notification preferences from the profile menu.
Profile & Settings is where you manage your personal account details, business information, checkout page branding, and how you receive notifications and reports. It is accessible from the profile dropdown in the top-right corner of the dashboard.
Accessing Profile & Settings
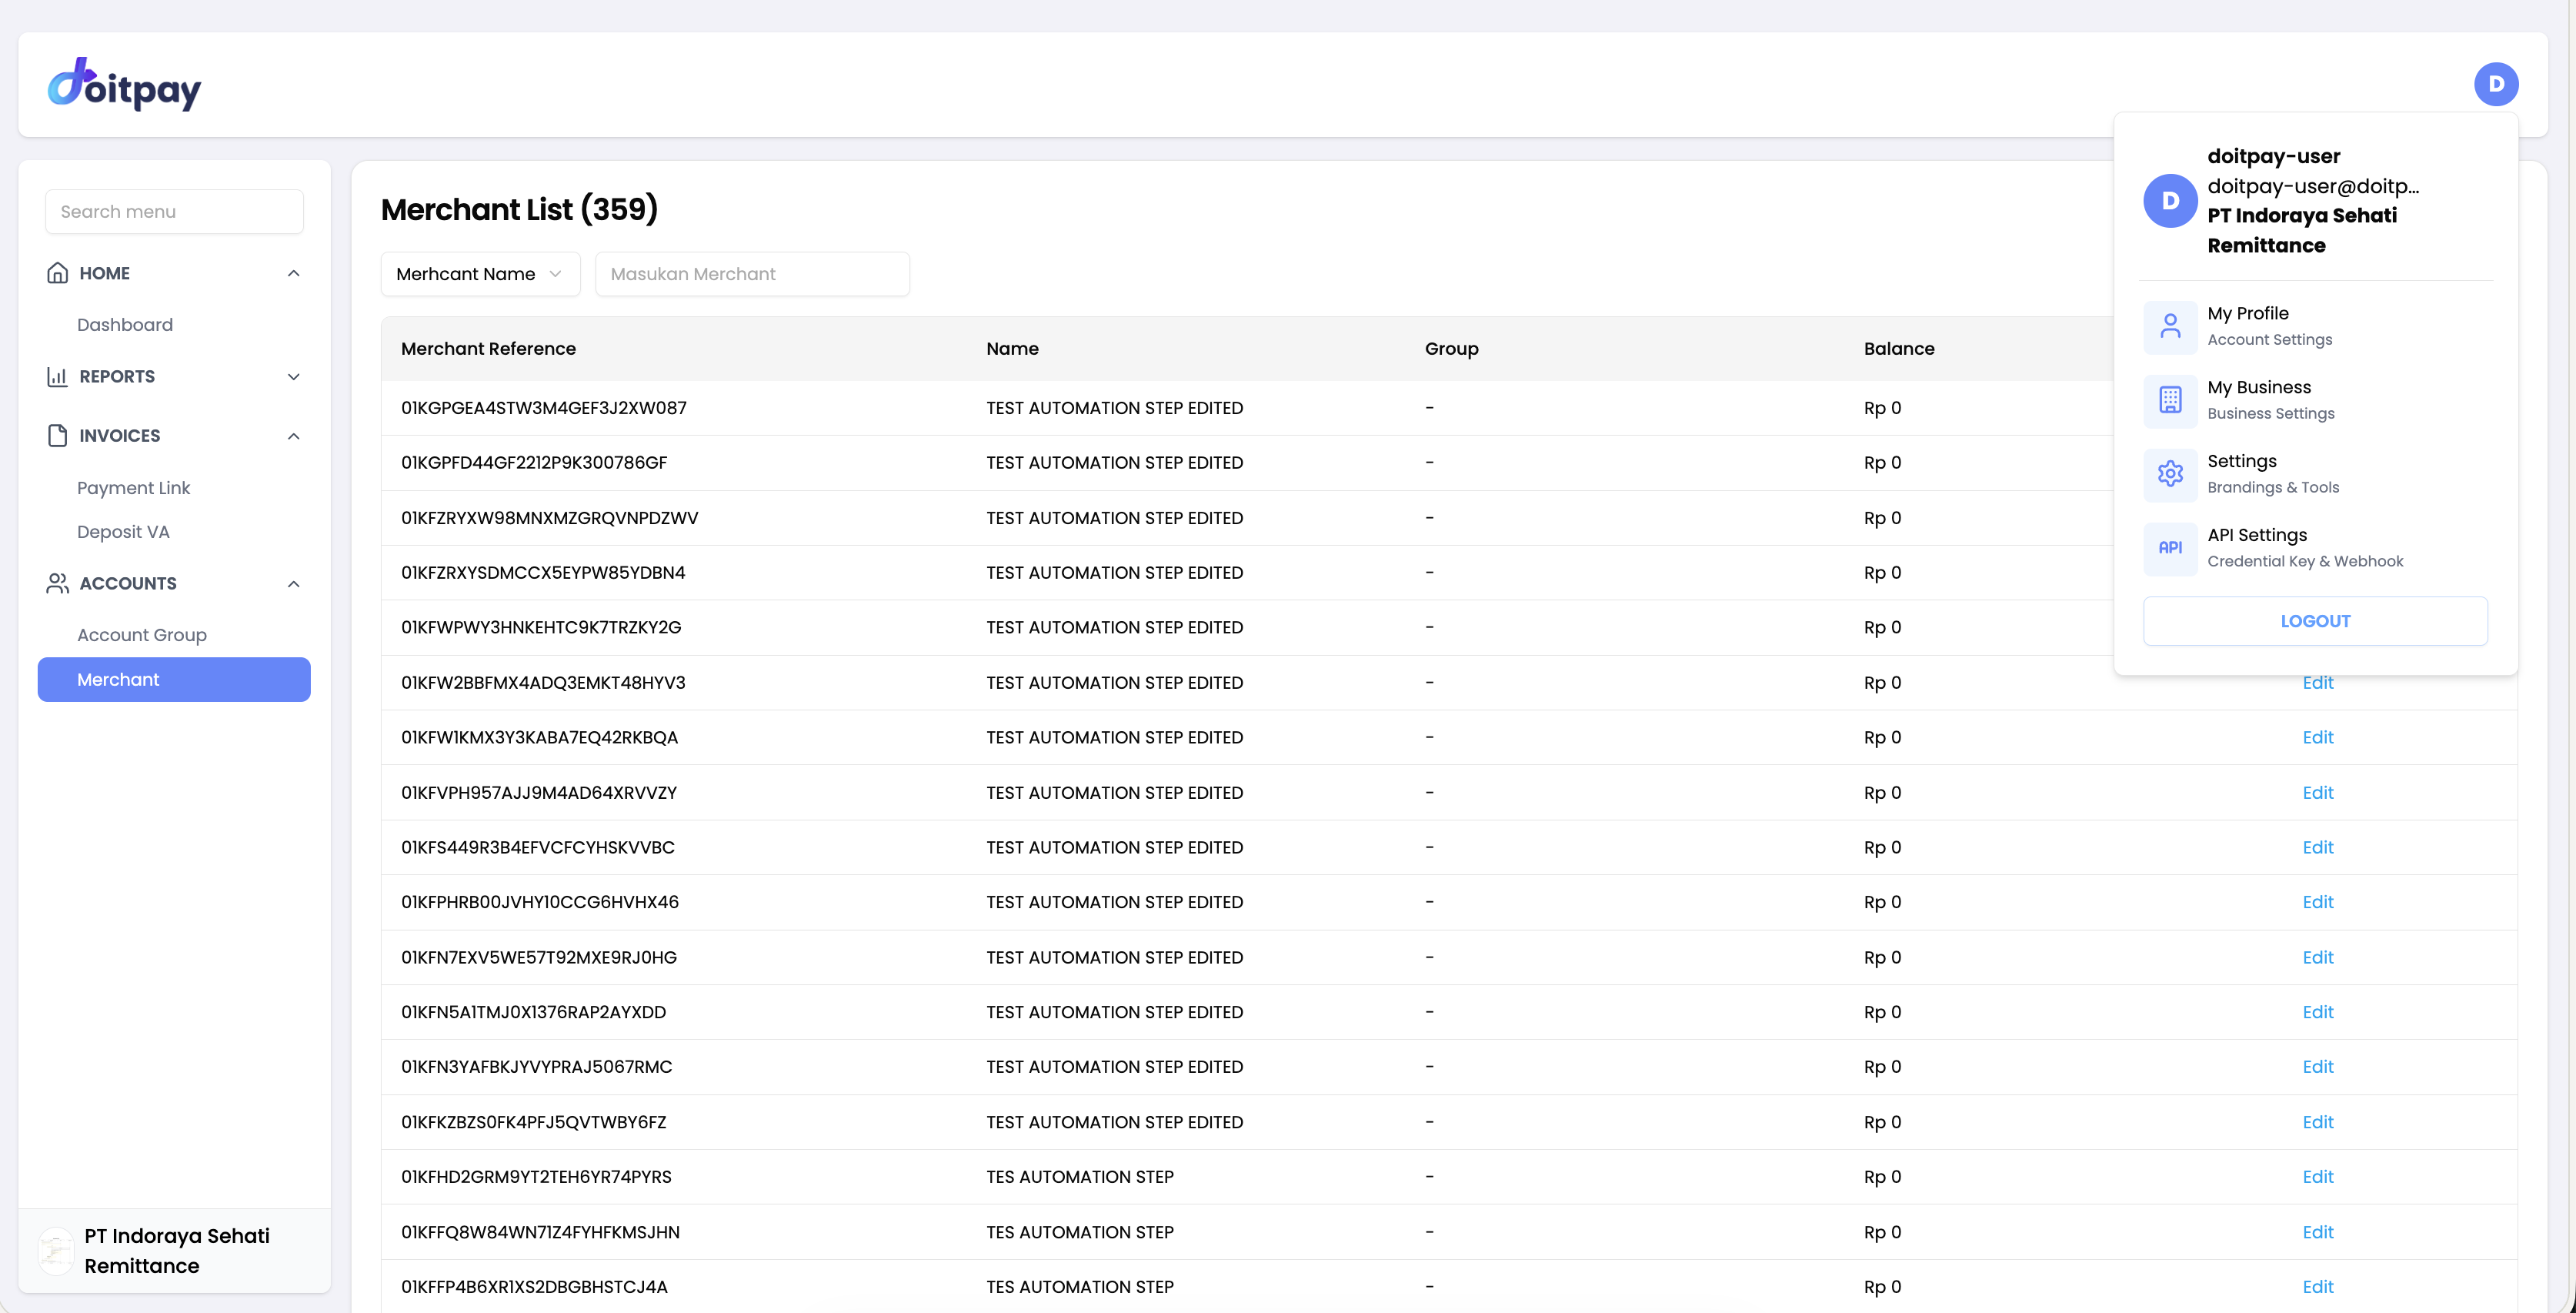
Click your profile icon (the circle with your initial) in the top-right corner of any page. A dropdown menu appears with the following options:
| Menu Item | Description |
|---|---|
| My Profile — Account Settings | View and update your personal profile, password, and 2FA |
| My Business — Business Settings | Update your business information and manage users |
| Settings — Brandings & Tools | Customize your checkout page appearance |
| Manage Notifications | Configure email notifications and report delivery |
| API Settings — Credential Key & Webhook | Manage API credentials and webhooks (independent businesses manage this here; accounts within a group manage this via Account Group) |
| Logout | Sign out of your account |
Profile Tab
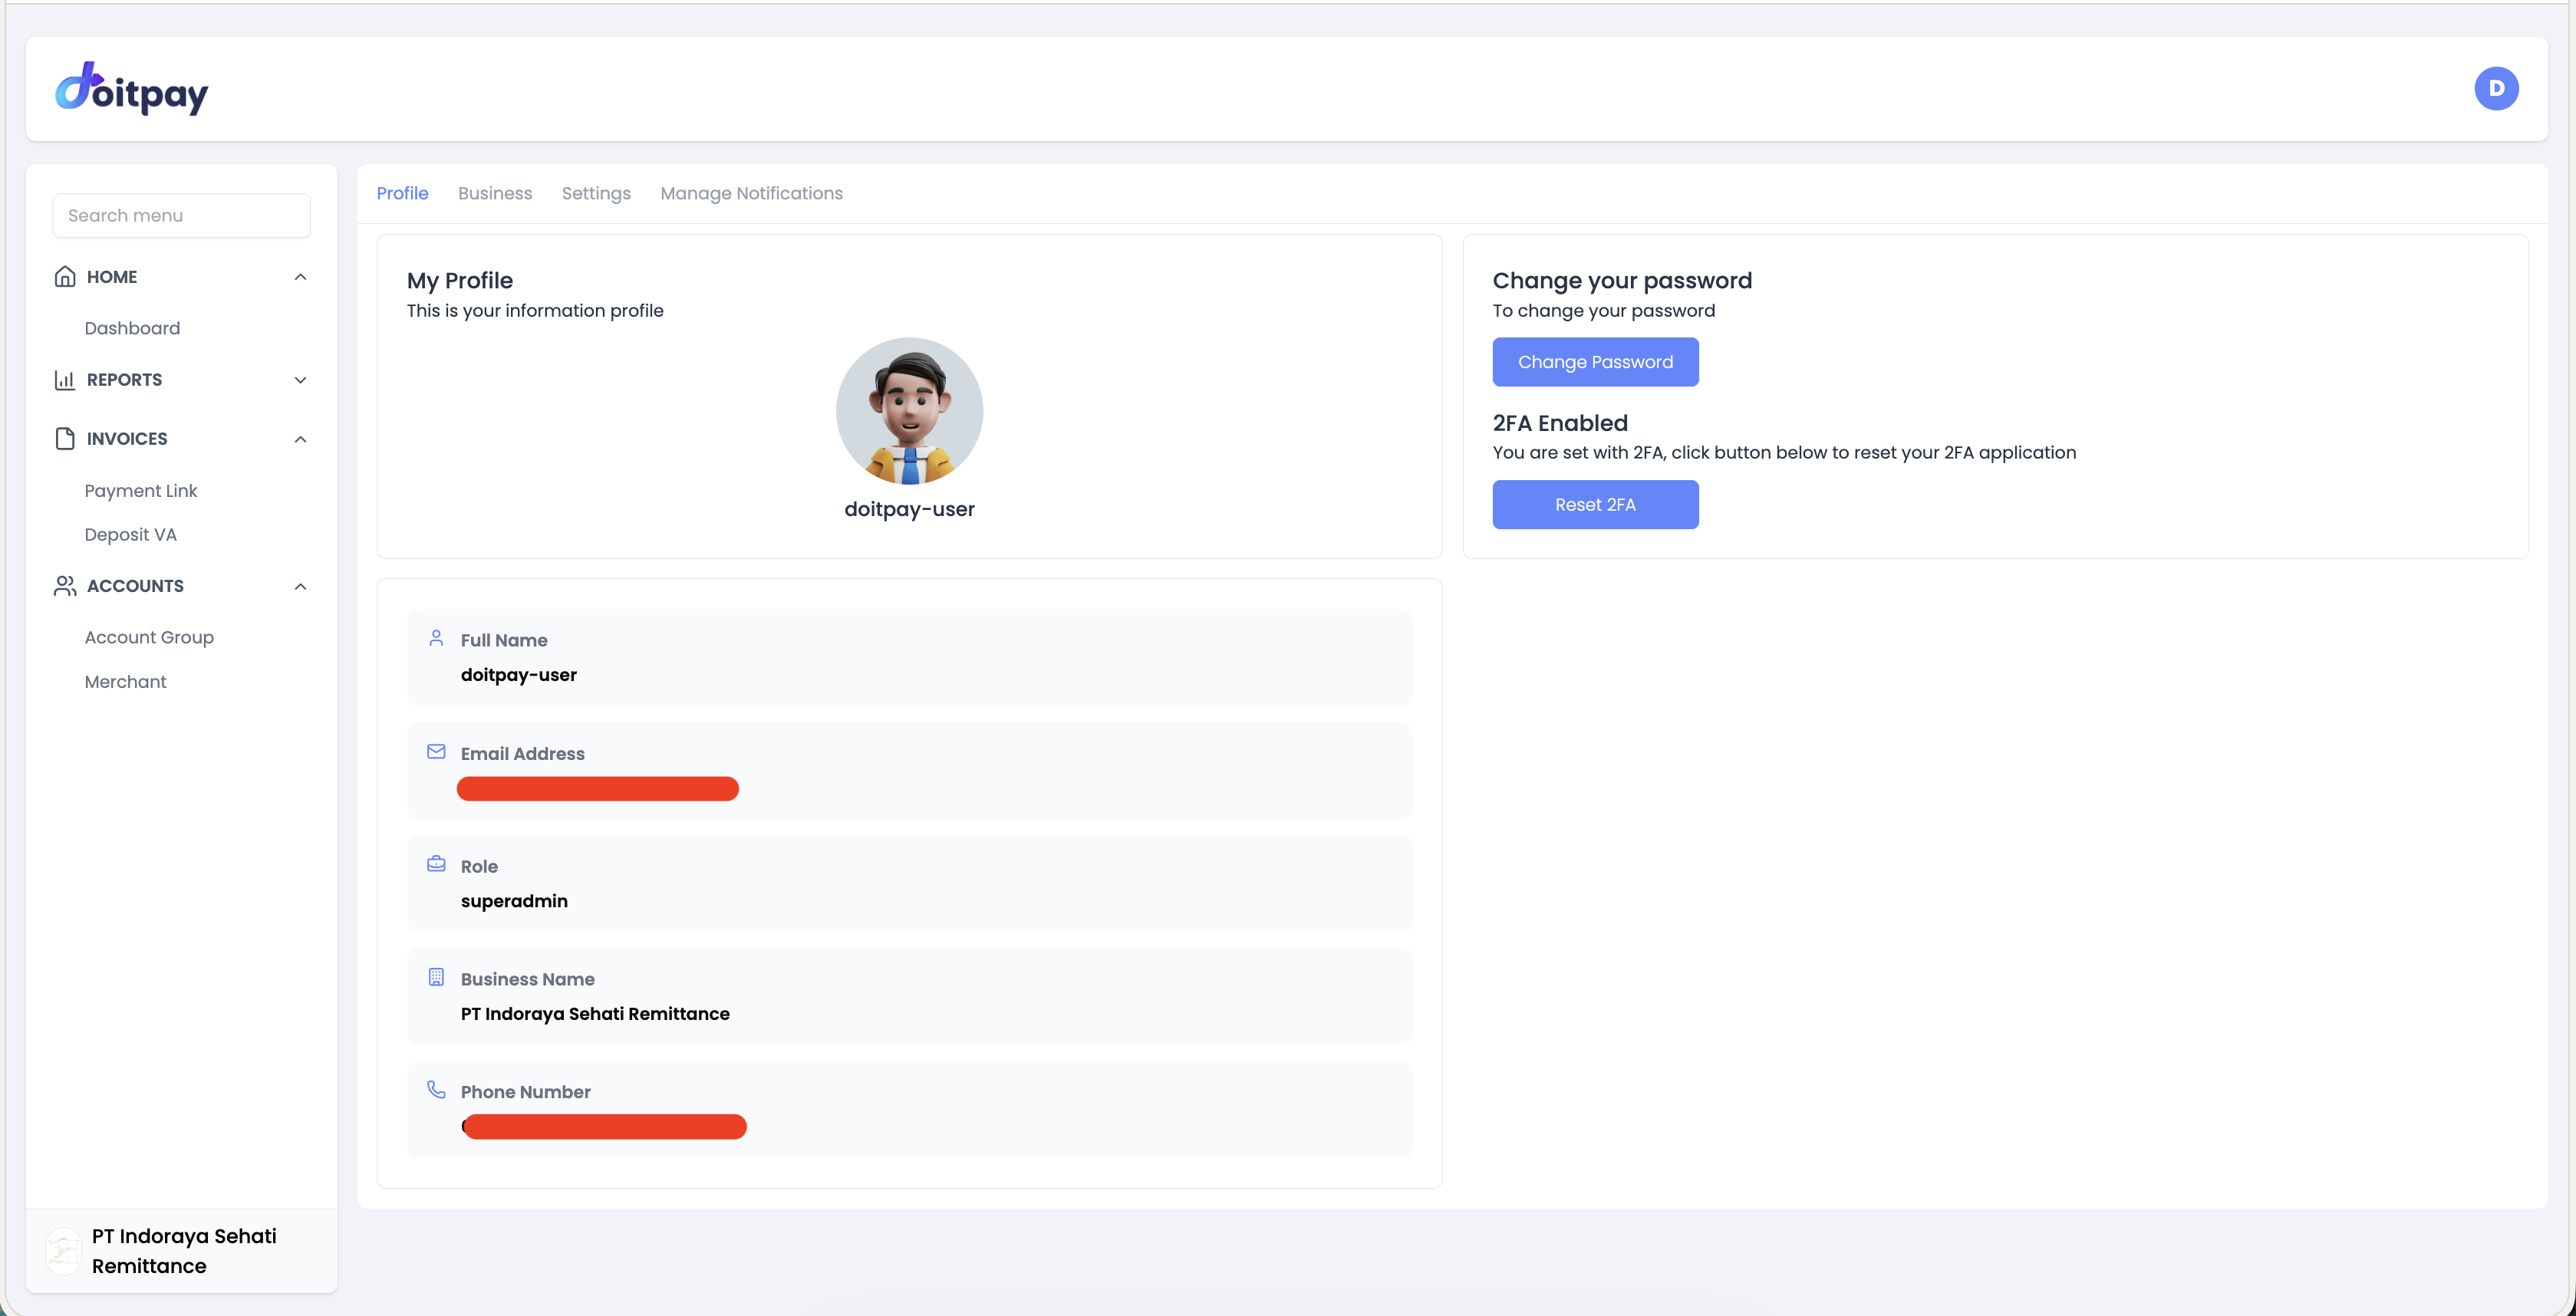
The Profile tab displays your personal account information.
| Field | Description |
|---|---|
| Full Name | Your display name in the dashboard |
| Email Address | Your registered login email |
| Role | Your permission level (admin or superadmin) |
| Business Name | The business you are currently associated with |
| Phone Number | Your registered phone number |
Change Password
Click Change Password to update your login password.
Two-Factor Authentication (2FA)
The 2FA panel shows whether 2FA is currently enabled or disabled on your account.
- If enabled, you will see a Reset 2FA button to reset your authenticator app (e.g., if you change devices)
- If disabled, a warning is shown in the top navigation — click it to set up 2FA for added security
Security Tip
Enabling 2FA is strongly recommended. It protects your account from unauthorized access even if your password is compromised.
Business Tab
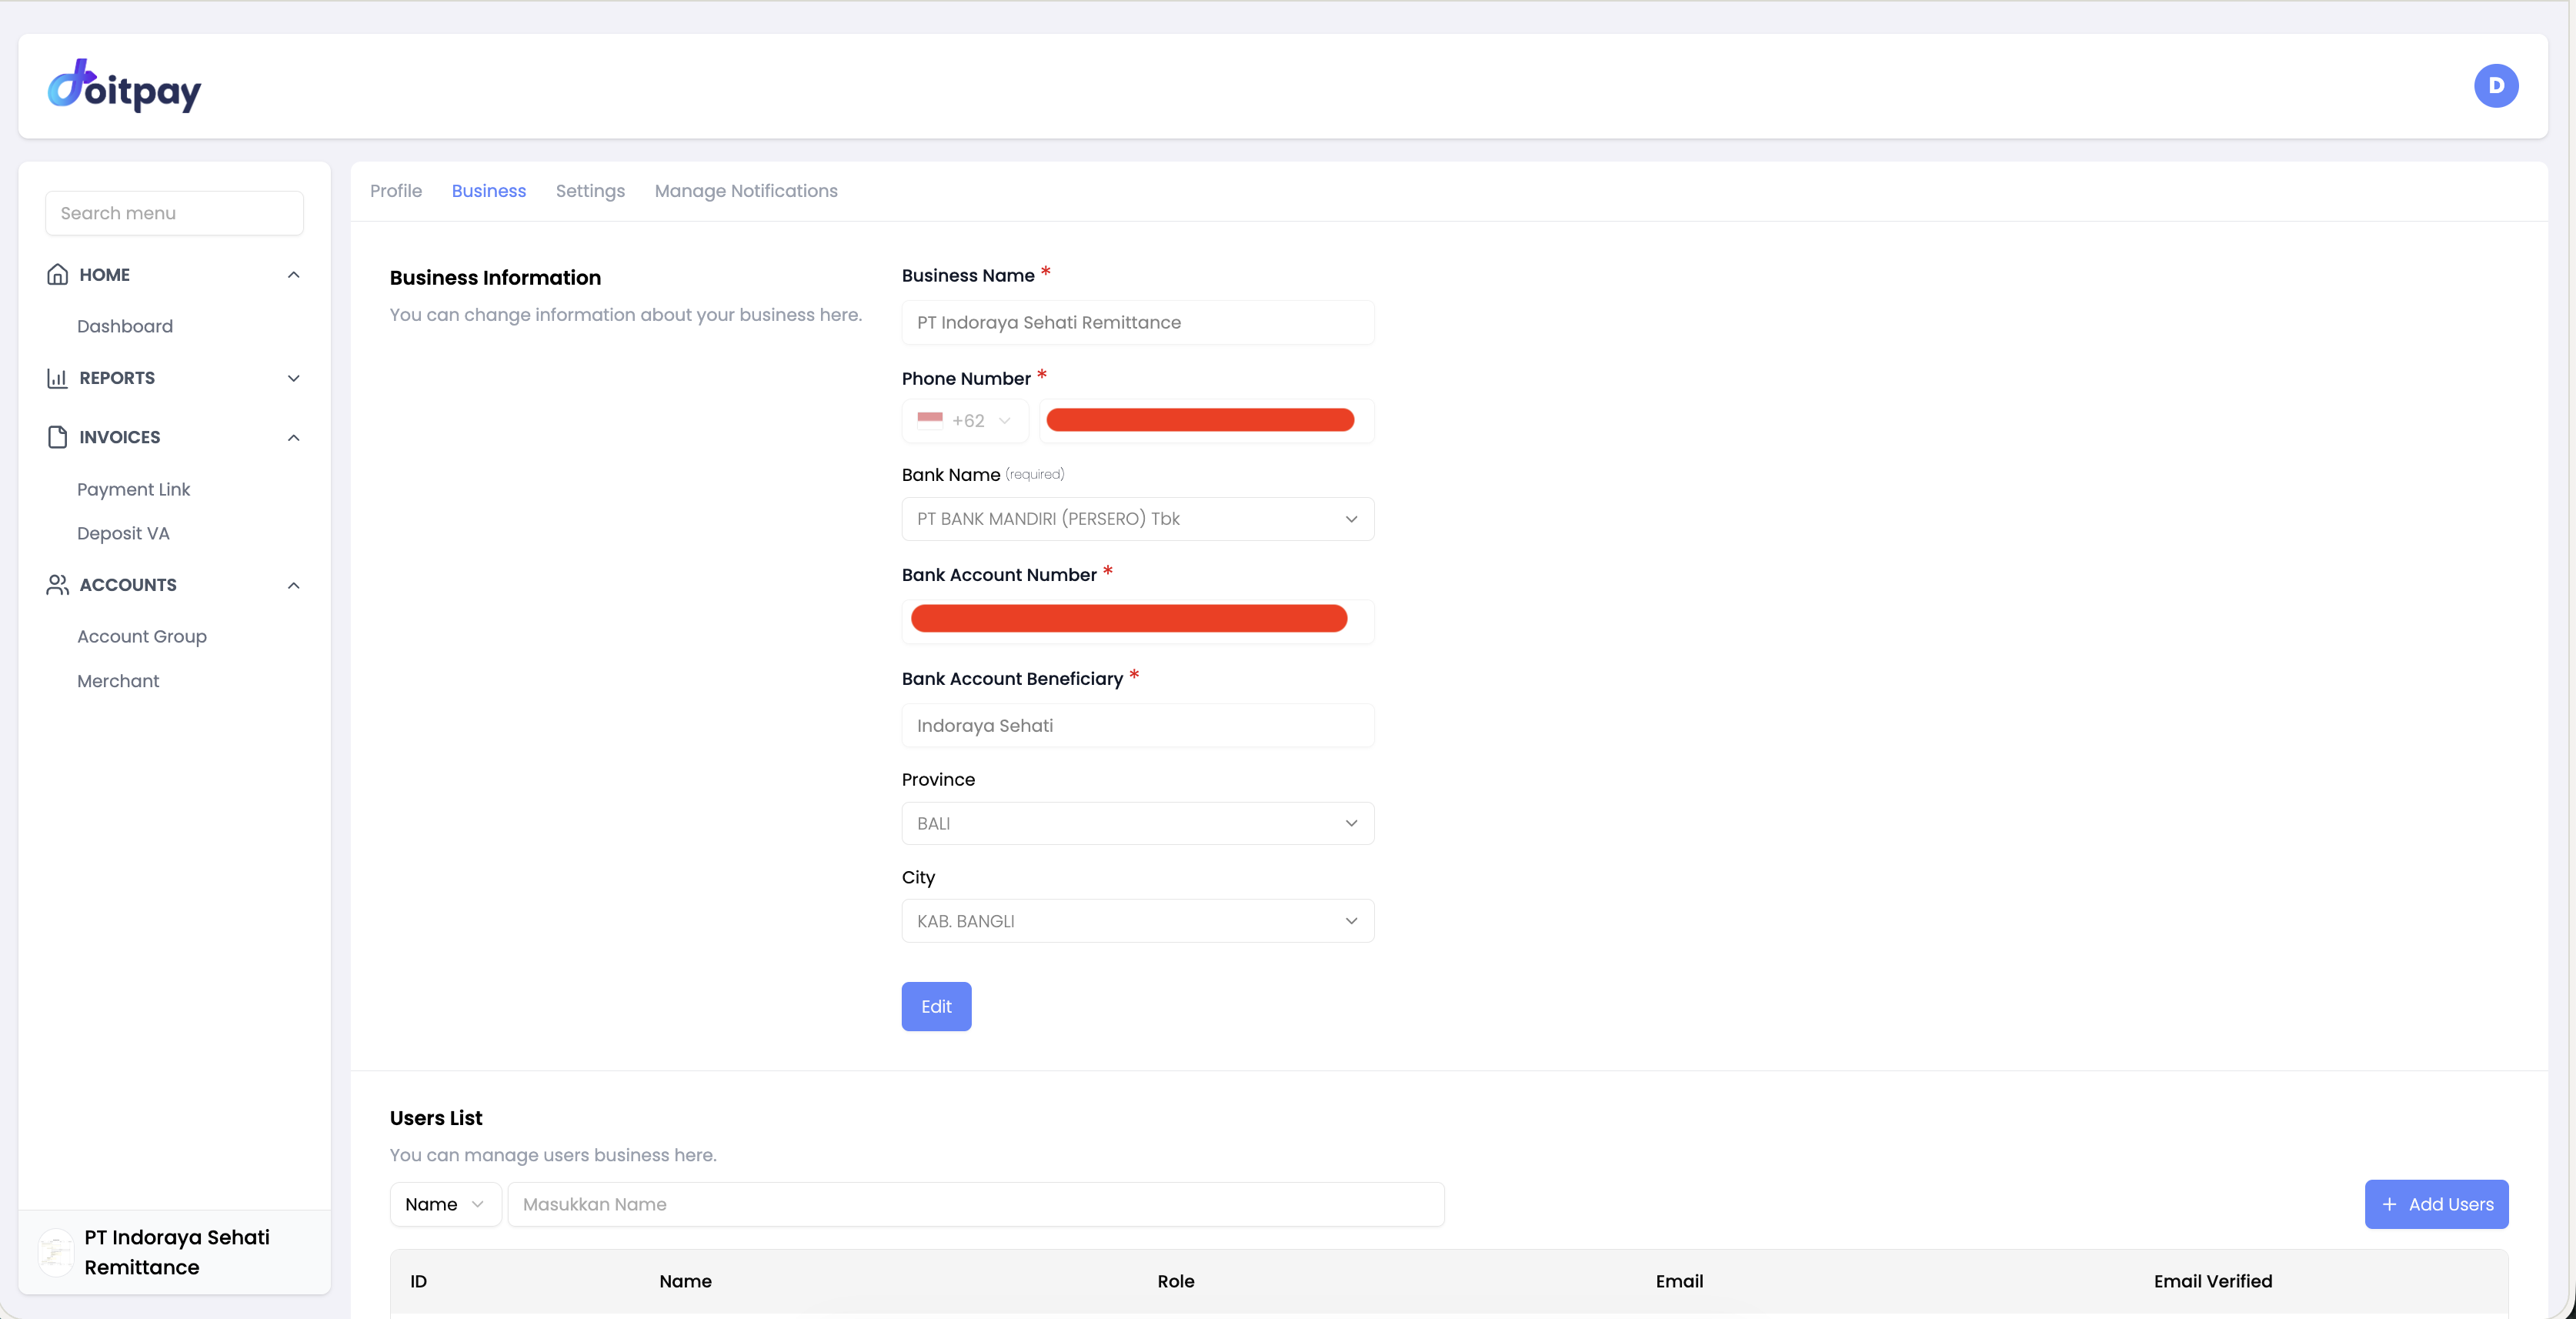
The Business tab lets you view and edit your business details and manage users who have access.
Business Information
| Field | Description |
|---|---|
| Business Name | Your registered business name |
| Phone Number | Business contact number |
| Bank Name | Bank used for settlement payouts |
| Bank Account Number | Account number for settlement |
| Bank Account Beneficiary | Name on the bank account |
| Province | Business province |
| City | Business city/district |
Click Edit to modify any of these fields.
Users List
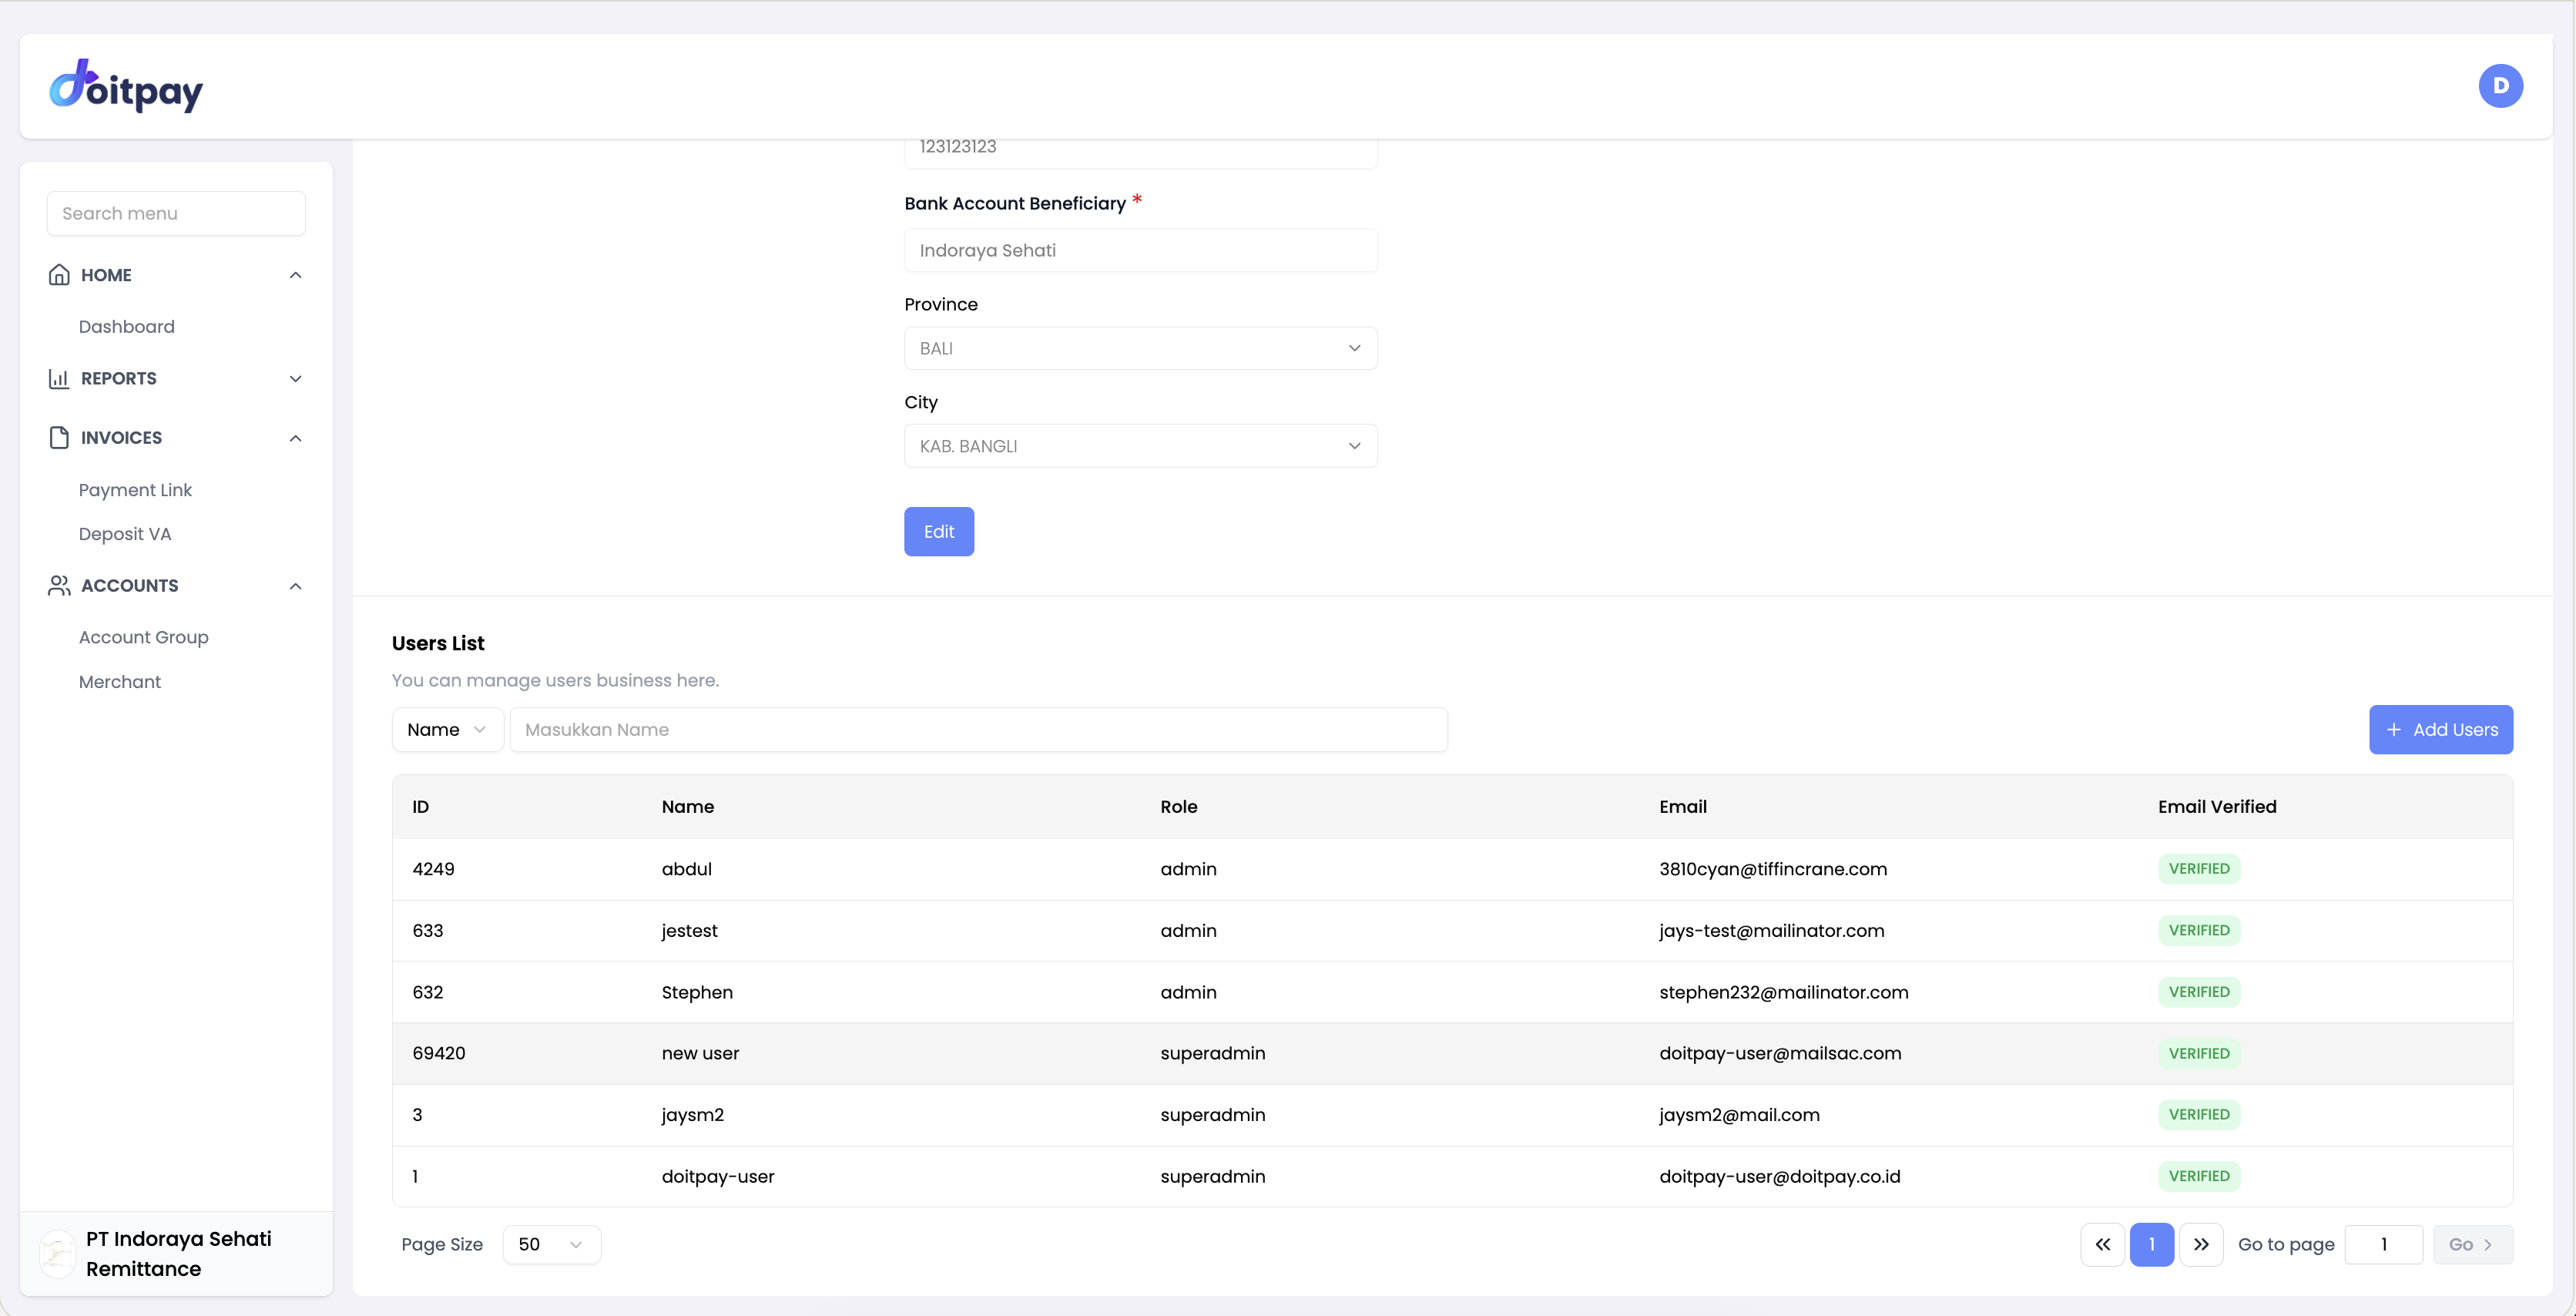
The Users List section shows all users with access to this business. Search by name using the filter field.
| Column | Description |
|---|---|
| ID | Unique user ID |
| Name | User's display name |
| Role | Permission level (admin or superadmin) |
| Registered email address | |
| Email Verified | Whether the email has been verified |
Click + Add Users to invite a new user to this business.
Adding a New User
To add a new user to your business, click the + Add Users button at the top-right of the Users List section. This opens the Invite User Business dialog.
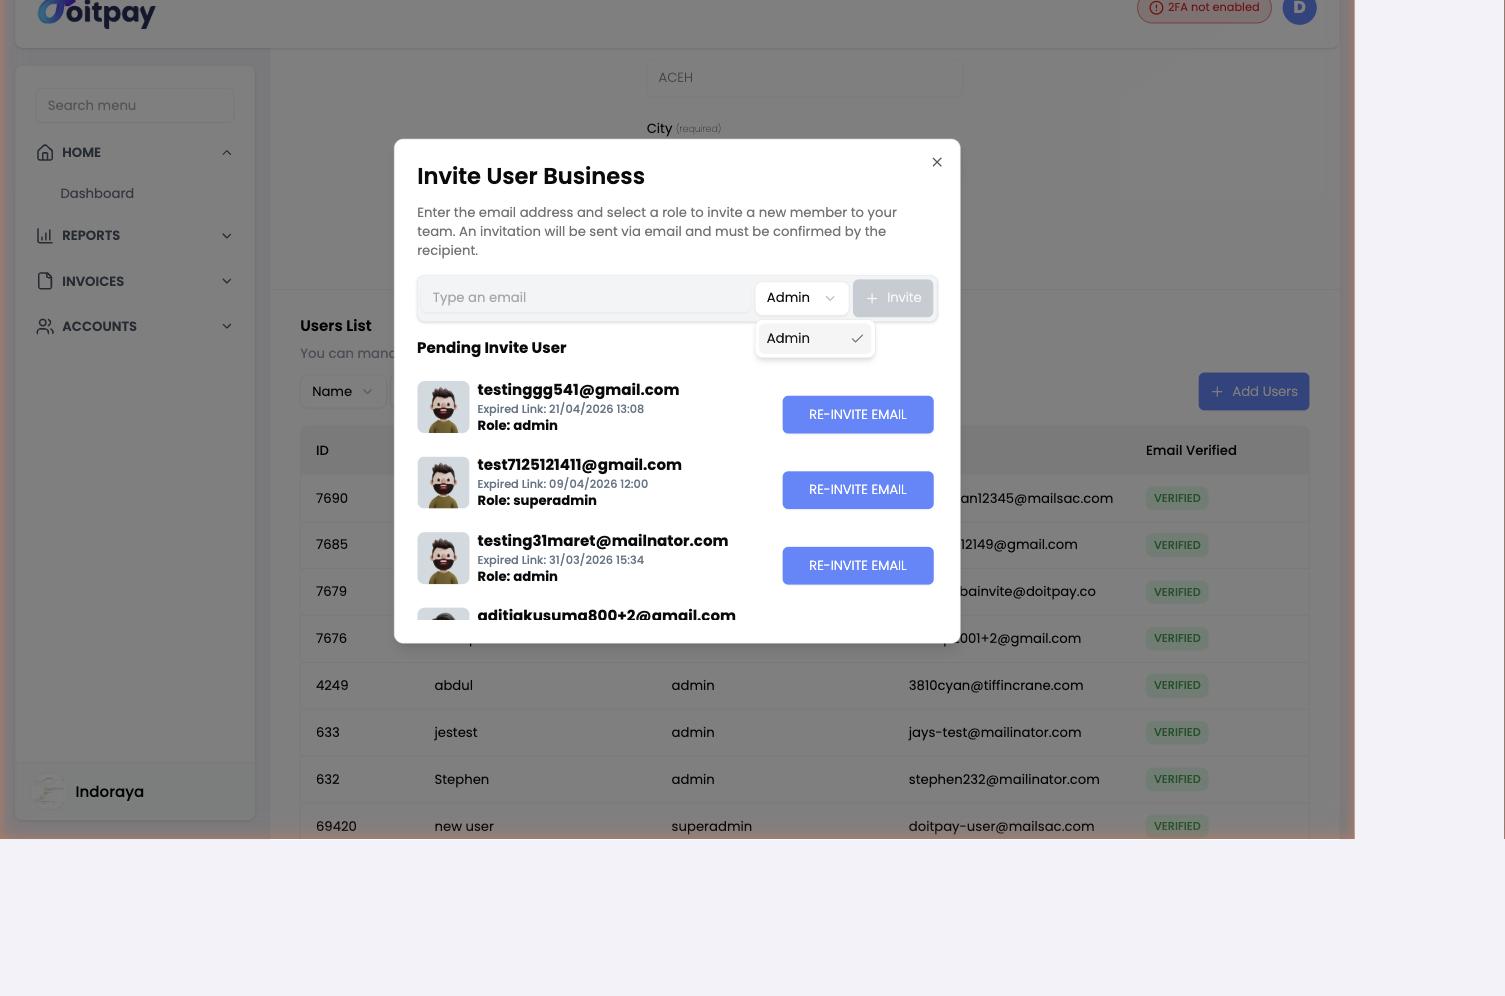
How to invite a user:
- Enter the new user's email address in the text field
- Select a role from the dropdown (e.g., Admin)
- Click the + Invite button to send the invitation
An invitation email will be sent to the provided email address. The recipient must click the link in the email to confirm and complete their registration.
Invitation Link Expiry
Invitation links expire after a set period. If a link expires before the user accepts, you can resend the invitation from the Pending Invite User section.
Pending Invite User
Below the invite form, the Pending Invite User section lists all outstanding invitations that have not yet been accepted. Each entry shows:
| Field | Description |
|---|---|
| The email address the invitation was sent to | |
| Expired Link | The date and time the invitation link expired (or will expire) |
| Role | The role assigned to the invited user |
If an invitation has expired, click the RE-INVITE EMAIL button next to the entry to send a new invitation email to the same user with a fresh link.
Settings Tab
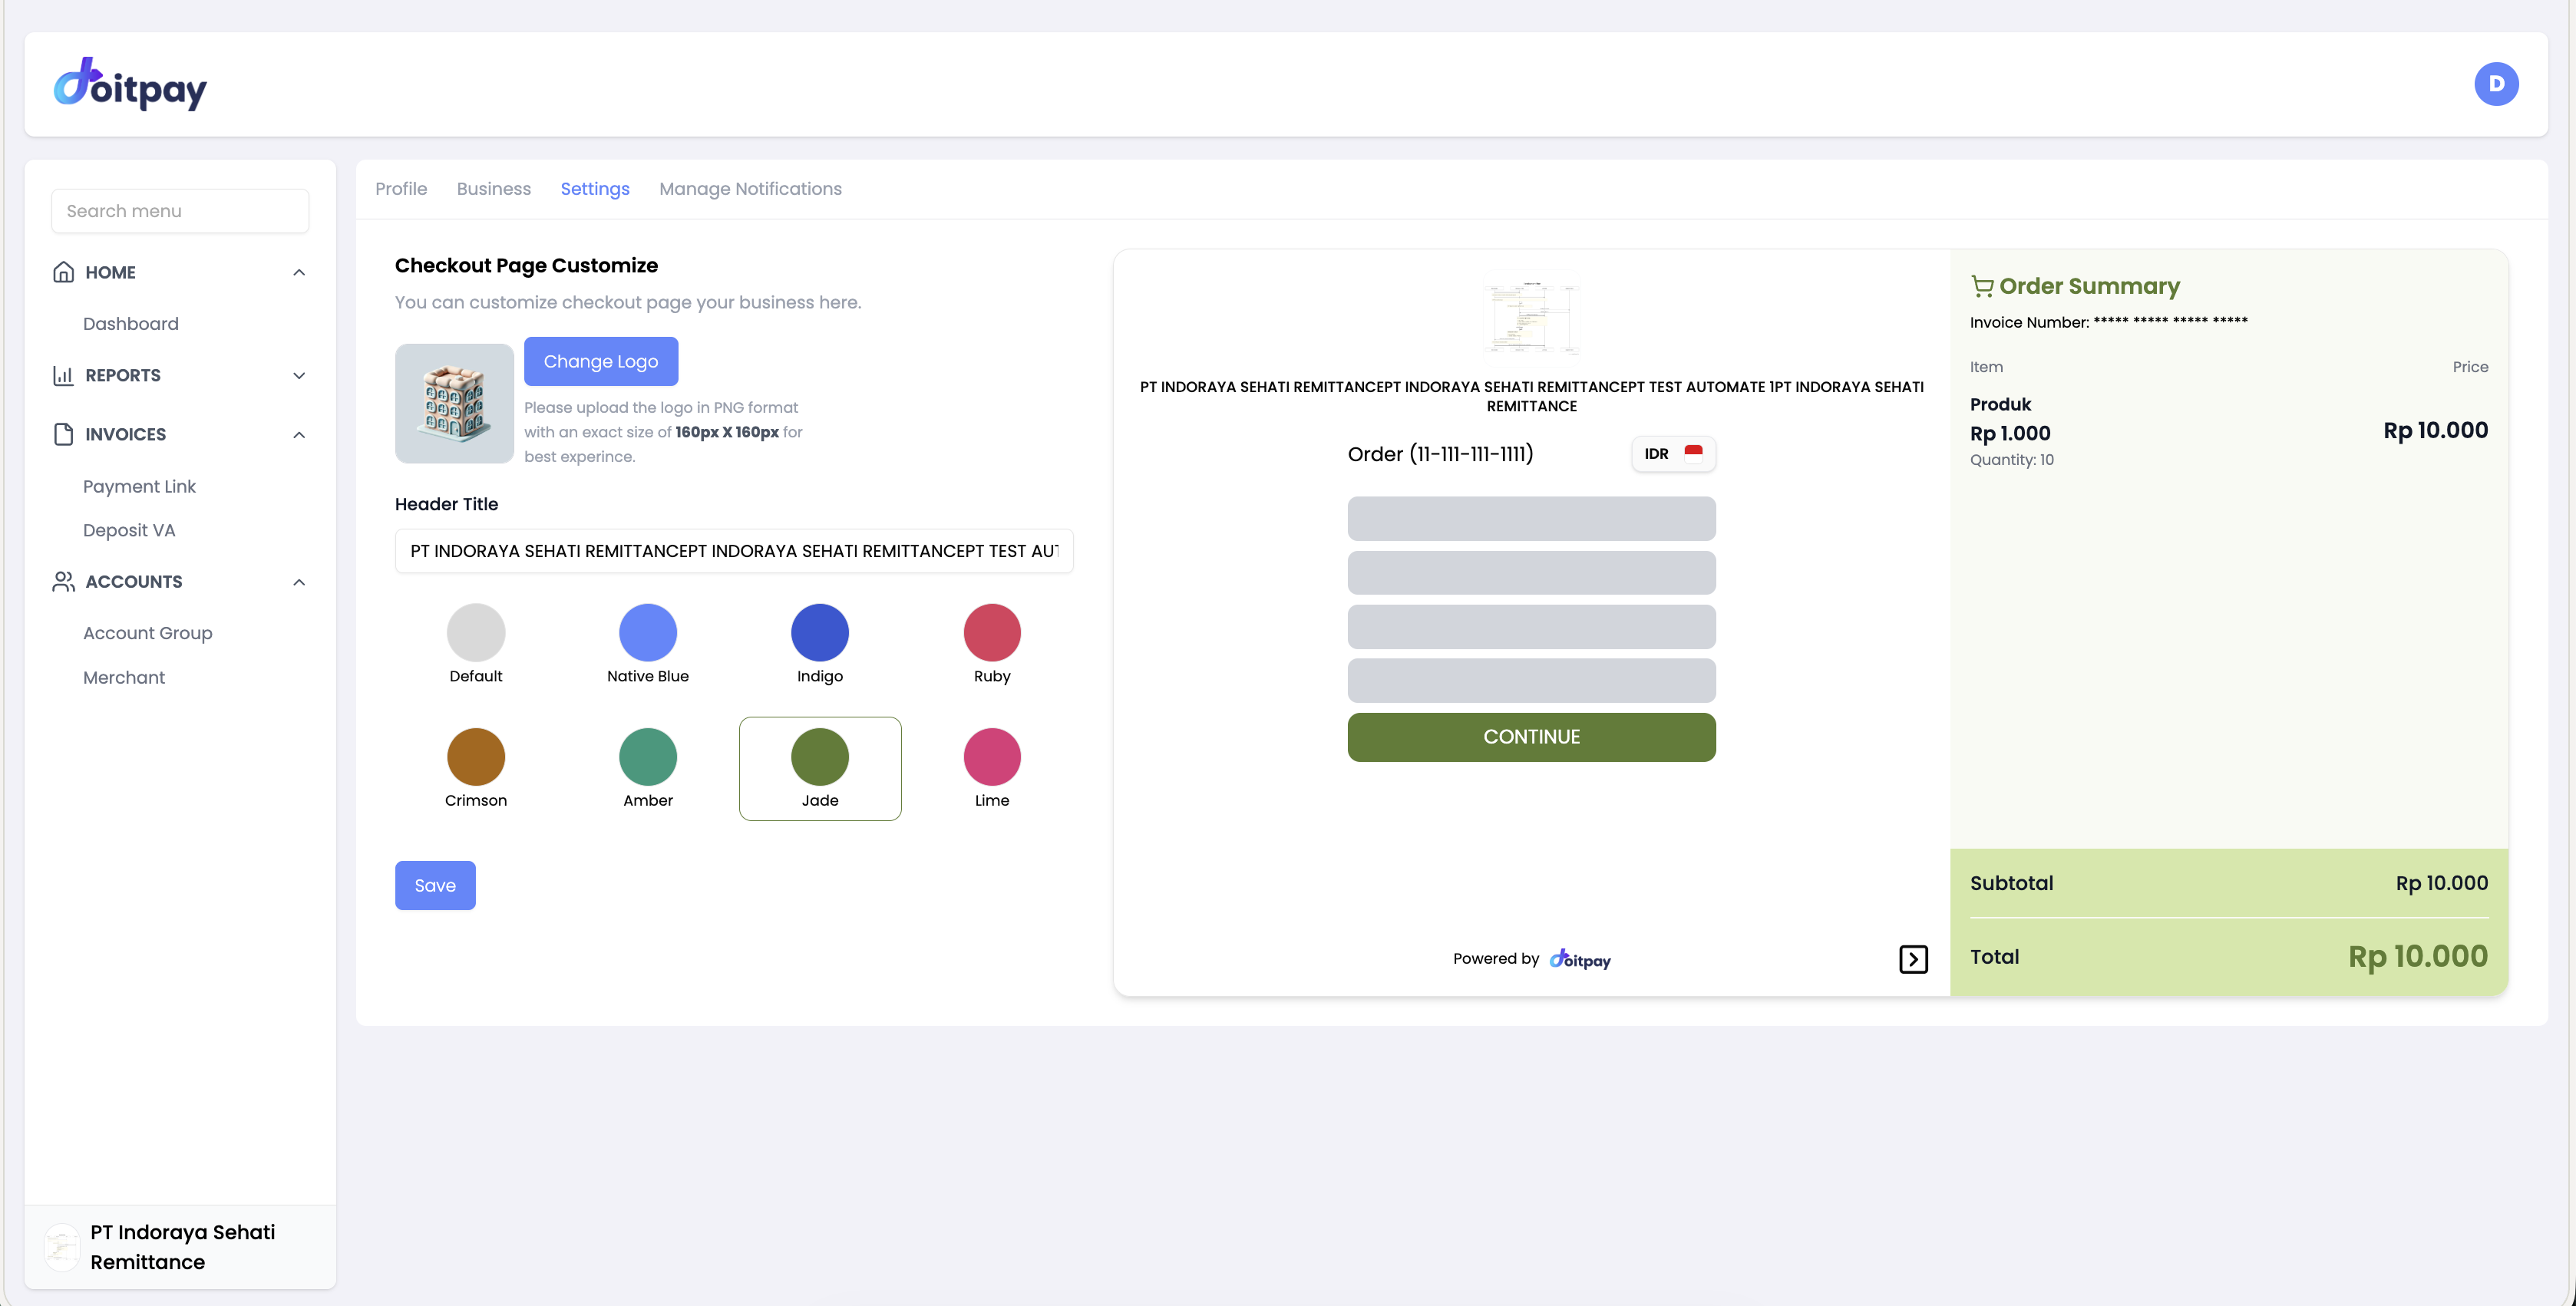
The Settings tab lets you customize how your checkout page looks to customers when they pay through a Payment Link.
Logo
Upload your business logo to appear on the checkout page:
- Click Change Logo
- Upload a PNG file at exactly 160px × 160px for best results
Header Title
Enter the text that appears as the heading on the customer-facing checkout page.
Theme Color
Choose one of eight preset color themes for your checkout page:
| Theme | Color |
|---|---|
| Default | Light grey |
| Native Blue | Blue |
| Indigo | Dark blue |
| Ruby | Red |
| Crimson | Dark red/brown |
| Amber | Orange/brown |
| Jade | Dark green |
| Lime | Pink/magenta |
The live preview on the right side of the page updates in real time as you make changes, so you can see exactly what your customers will see.
Click Save to apply your changes.
Manage Notifications Tab
Manage Notifications has two sub-tabs: Notifications and Configuration.
Notifications Sub-tab
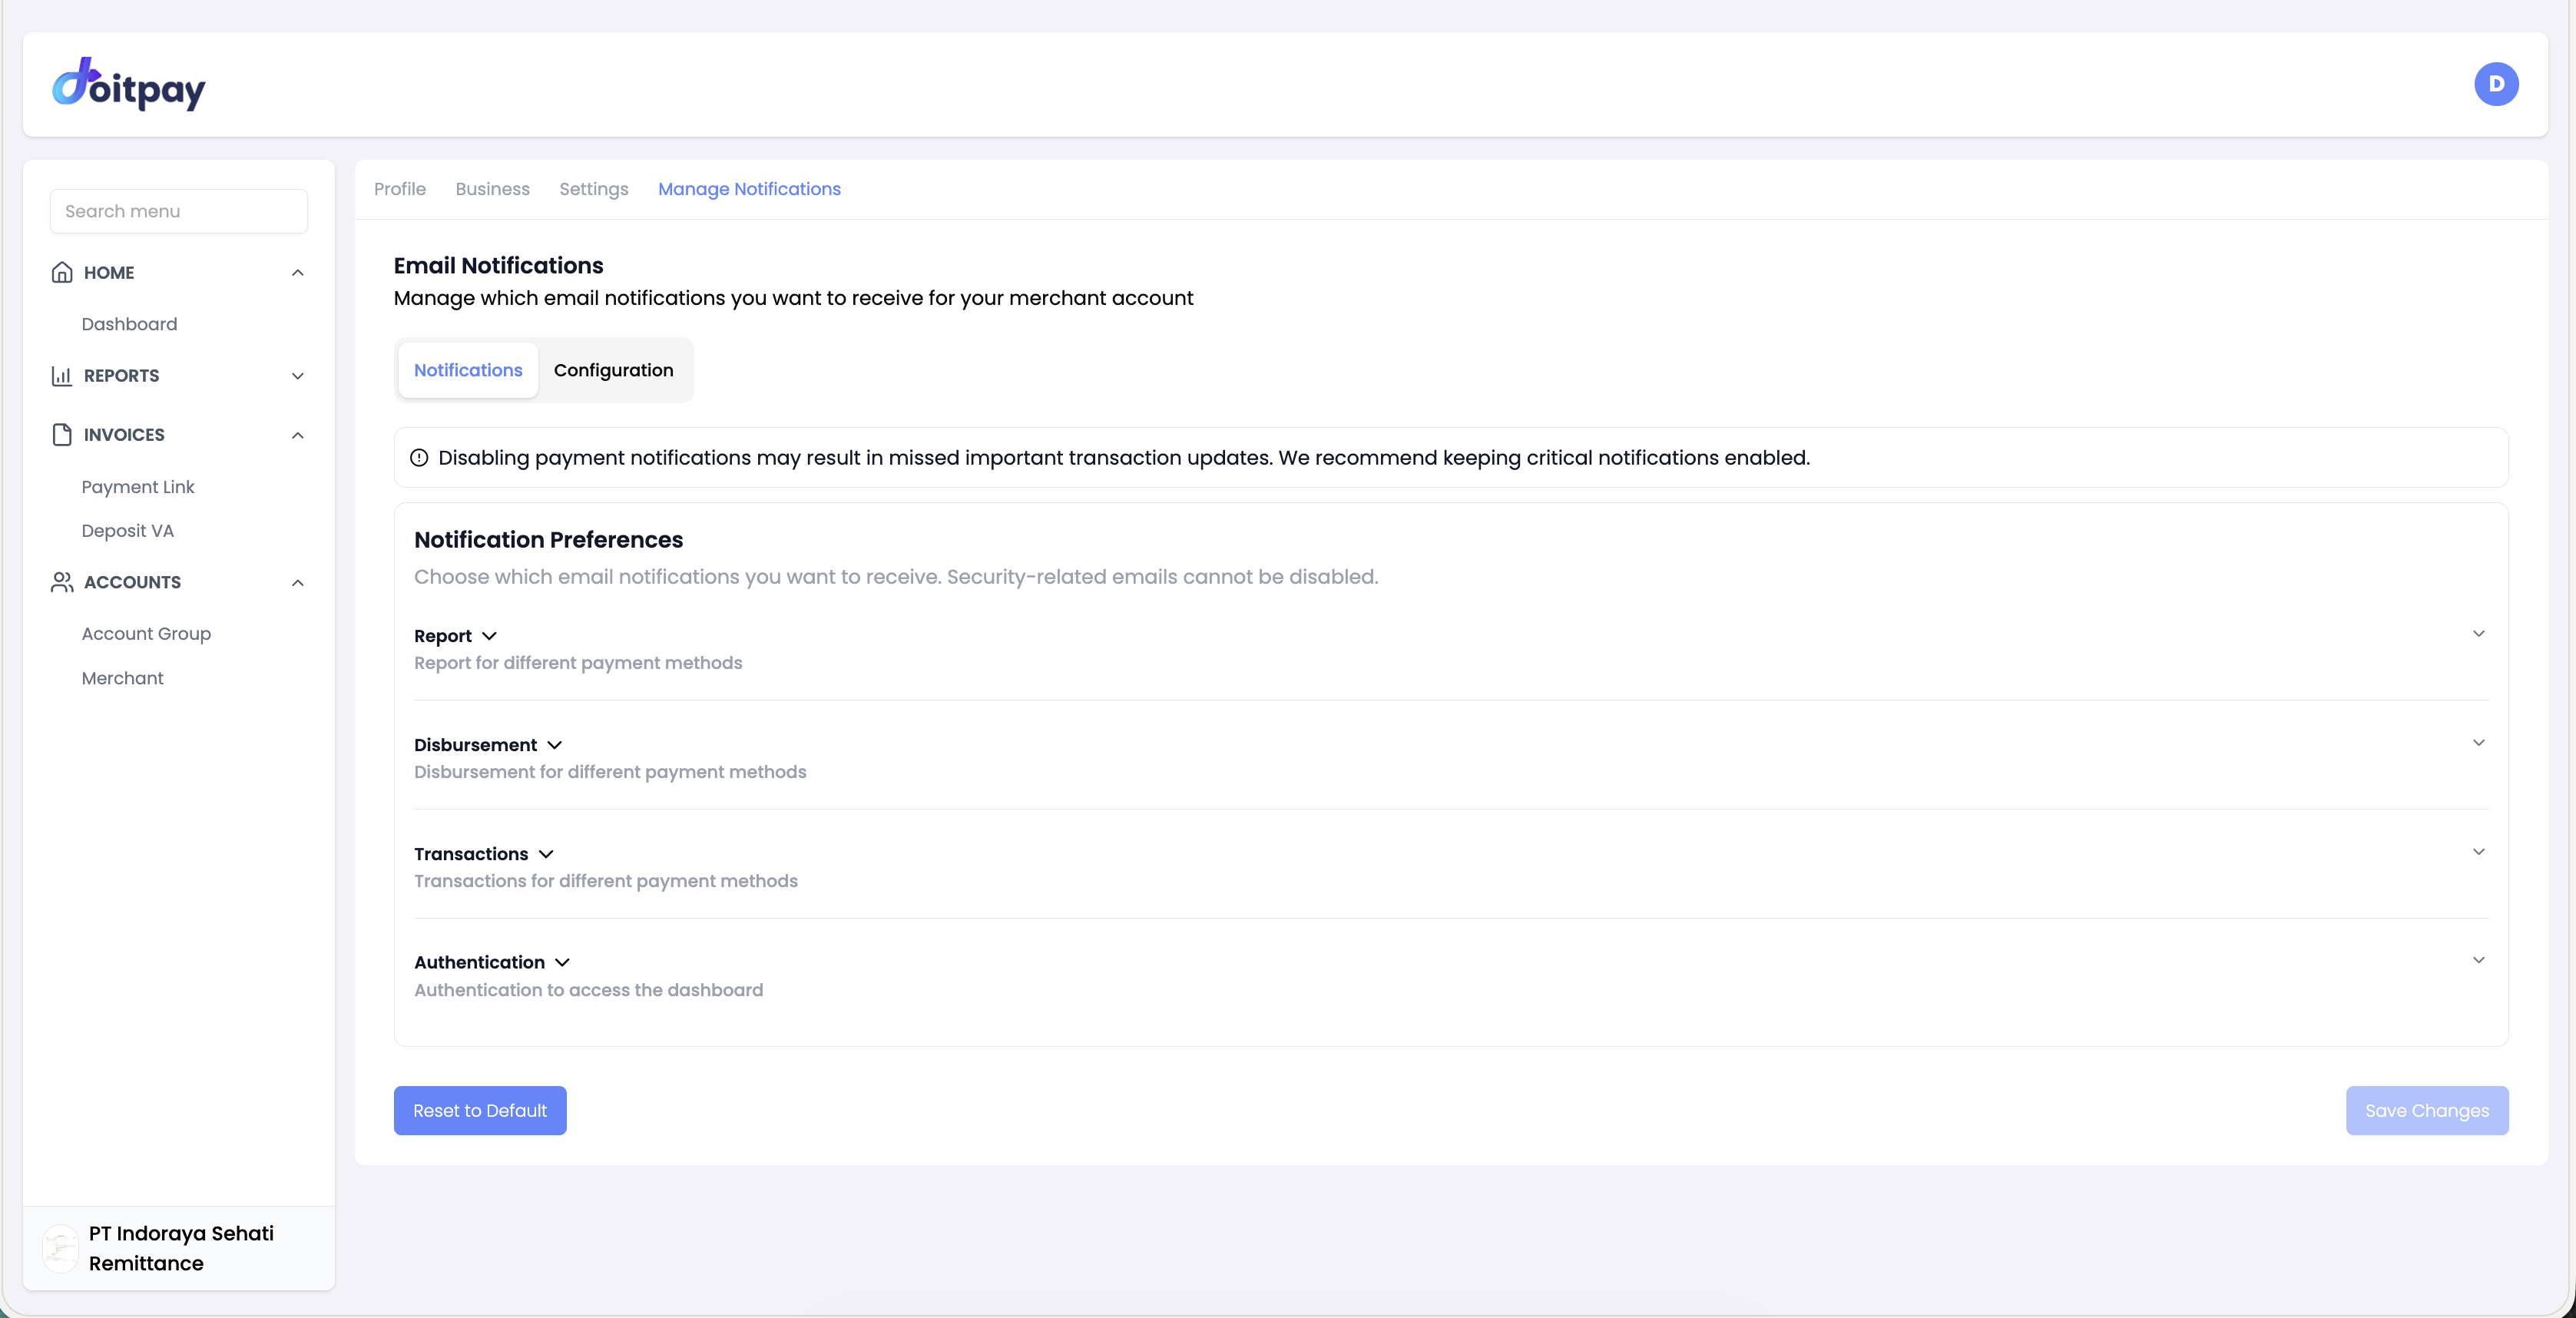
Configure which email notifications you receive for your merchant account.
Important
Disabling payment notifications may result in missed important transaction updates. We recommend keeping critical notifications enabled.
Notification preferences are organized into collapsible groups:
| Group | What it covers |
|---|---|
| Report | Email alerts for different payment method reports |
| Disbursement | Notifications for disbursement transactions |
| Transactions | Alerts for incoming transactions by payment method |
| Authentication | Notifications for dashboard login and access events |
Expand each group to enable or disable individual notification types. Click Save Changes to apply, or Reset to Default to restore all defaults.
Configuration Sub-tab
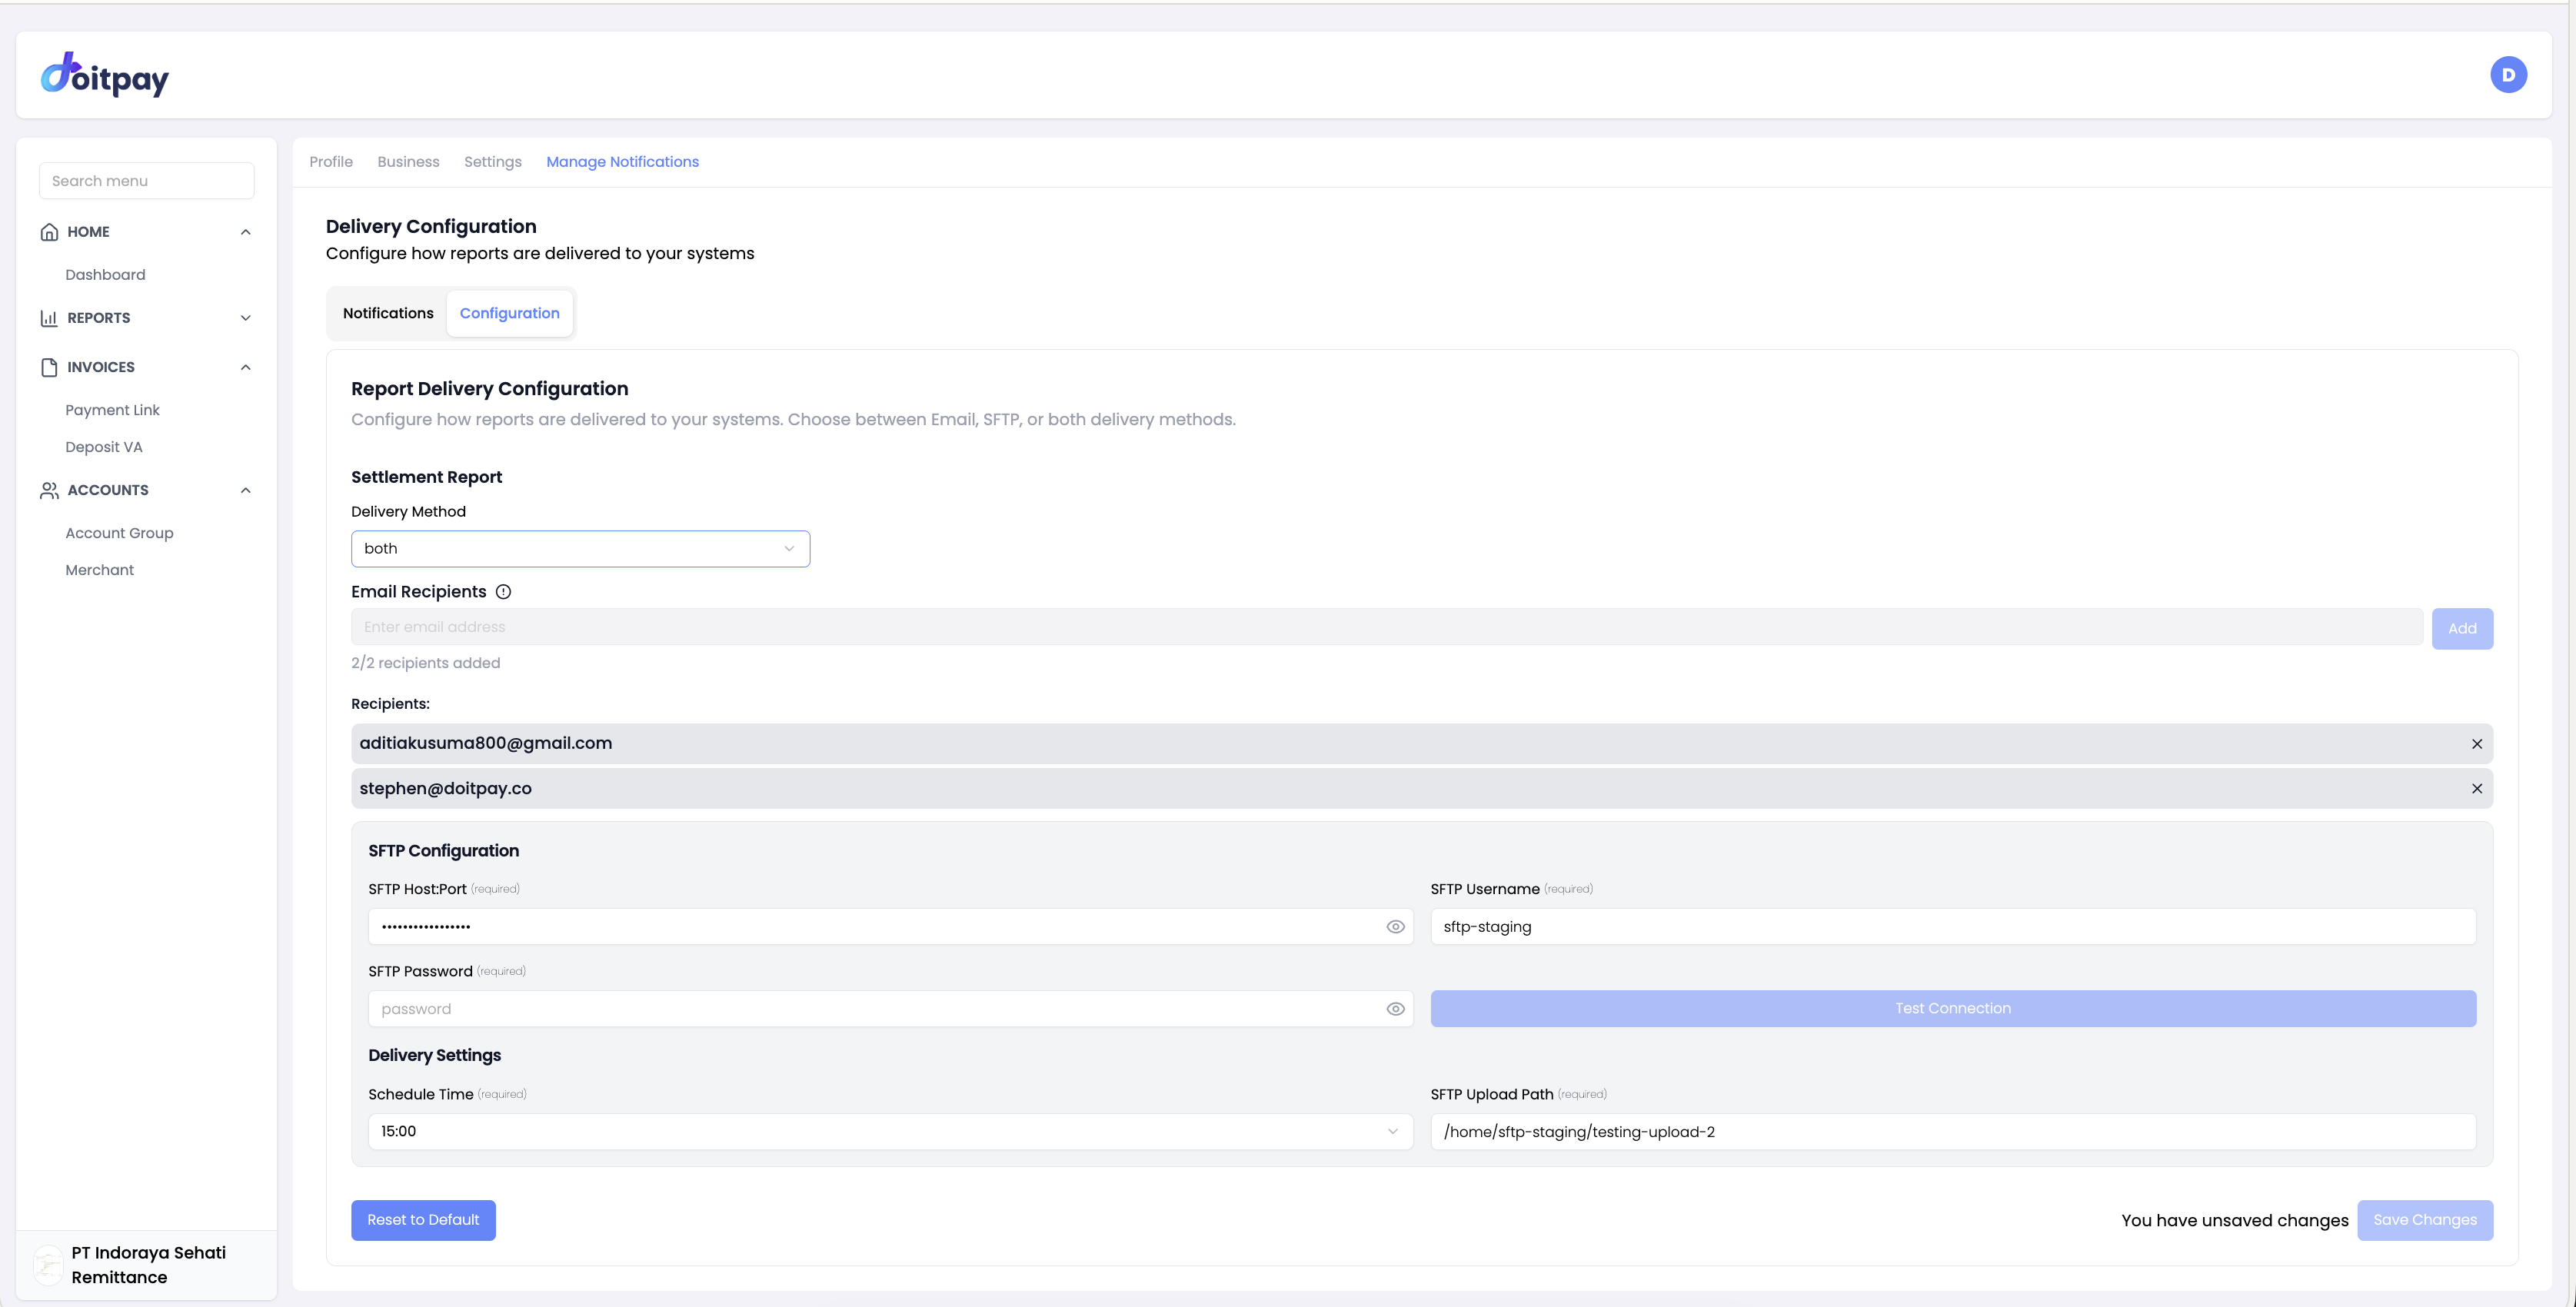
Configure how your reports are automatically delivered to your systems. You can choose between Email, SFTP, or both delivery methods.
Settlement Report Delivery
Delivery Method
Select how settlement reports are sent:
| Option | Description |
|---|---|
| Reports are emailed to the configured recipients | |
| SFTP | Reports are pushed to your SFTP server |
| Both | Reports are sent via both email and SFTP |
Email Recipients
Add one or more email addresses to receive reports. Click Add after entering each address. Click the × next to an address to remove it.
SFTP Configuration
| Field | Description |
|---|---|
| SFTP Host:Port | Your SFTP server address and port |
| SFTP Username | Username for SFTP authentication |
| SFTP Password | Password for SFTP authentication |
Click Test Connection to verify that Doitpay can connect to your SFTP server before saving.
Delivery Settings
| Field | Description |
|---|---|
| Schedule Time | Time of day the report is delivered (24-hour format) |
| SFTP Upload Path | Directory path on your SFTP server where files are uploaded |
Click Save Changes to apply your configuration, or Reset to Default to restore all defaults.
API Settings Tab
For Independent Businesses
This section applies to independent business accounts that are not part of an account group. If your business belongs to an account group, API settings are managed through the Account Group page instead — see Account Group - Api Settings.
Independent businesses can manage their API credentials and webhook configurations directly from the profile dropdown. Click your profile icon in the top-right corner, then select API Settings.

The API Settings page has two tabs: Credential Key and Webhook Setting.
Credential Key
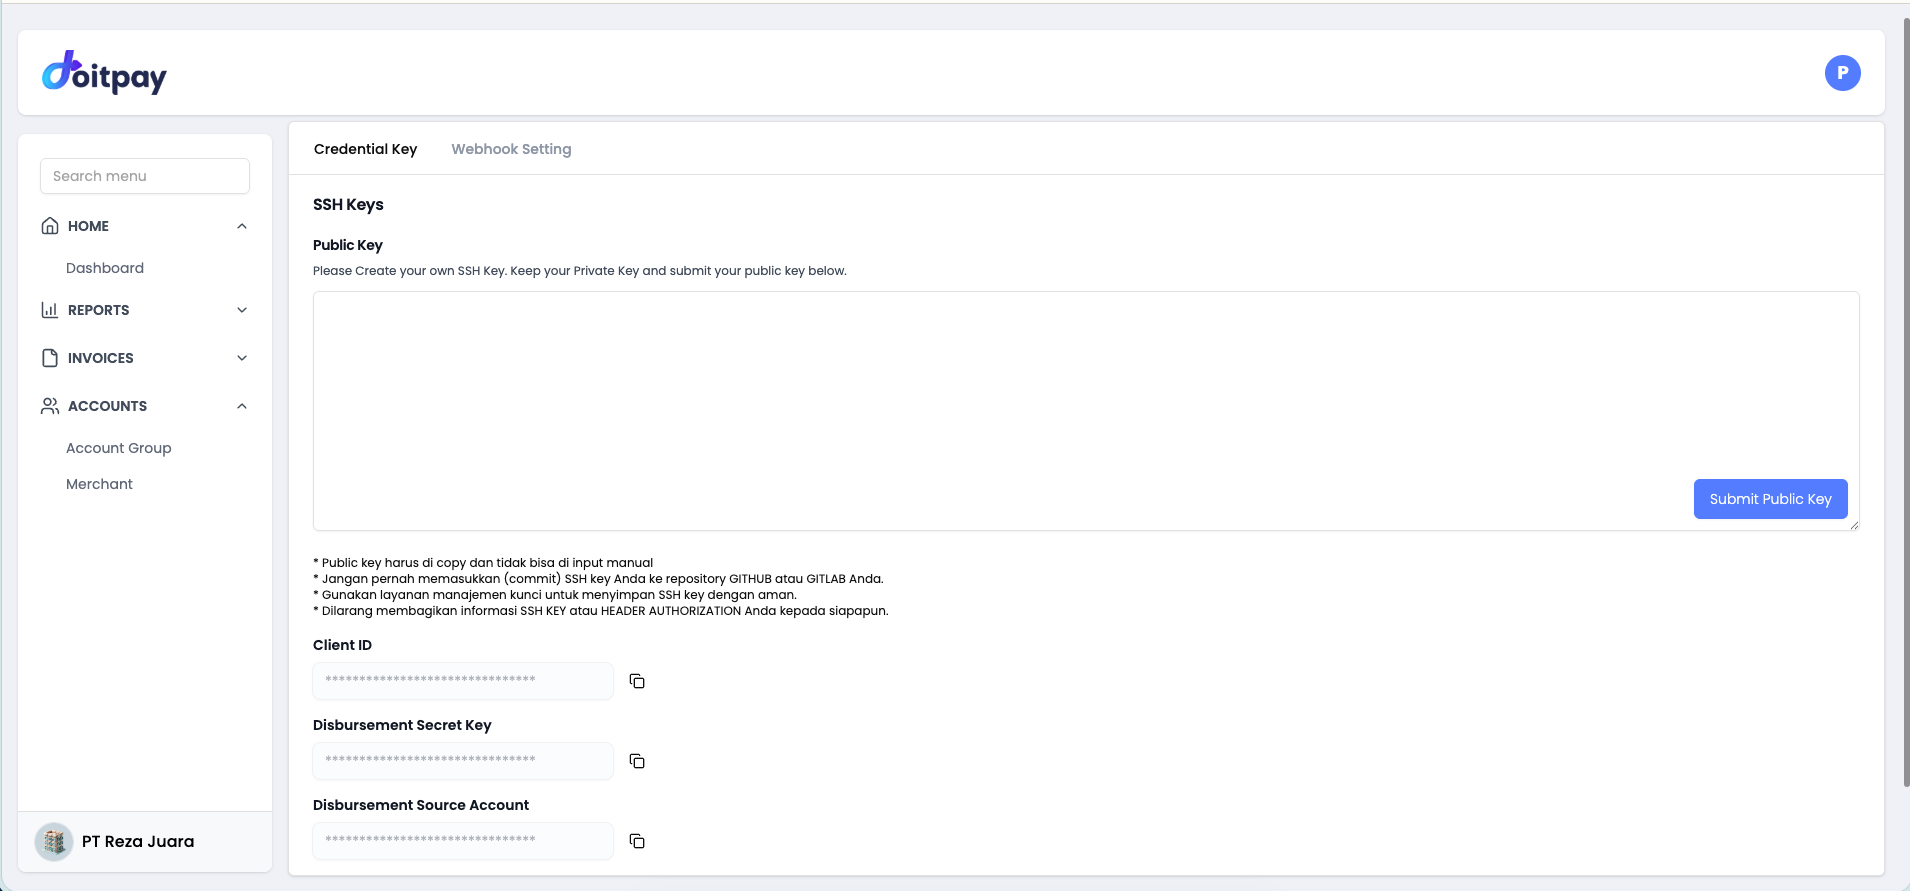
SSH Keys
To authenticate API requests, you need to submit your Public Key:
- Generate an SSH key pair on your system
- Paste your public key into the text area
- Click Submit Public Key
Security Notice
- The public key must be copied and pasted — it cannot be typed manually
- Never commit your SSH key to a GitHub or GitLab repository
- Use a key management service to store your SSH keys securely
- Never share your SSH KEY or HEADER AUTHORIZATION information with anyone
API Credentials
| Field | Description |
|---|---|
| Client ID | Your unique client identifier for API authentication |
| Disbursement Secret Key | Secret key used to sign disbursement API requests |
| Disbursement Source Account | The source account number used for disbursements |
Click the copy icon next to each field to copy the value to your clipboard. All values are masked for security.
Webhook Setting
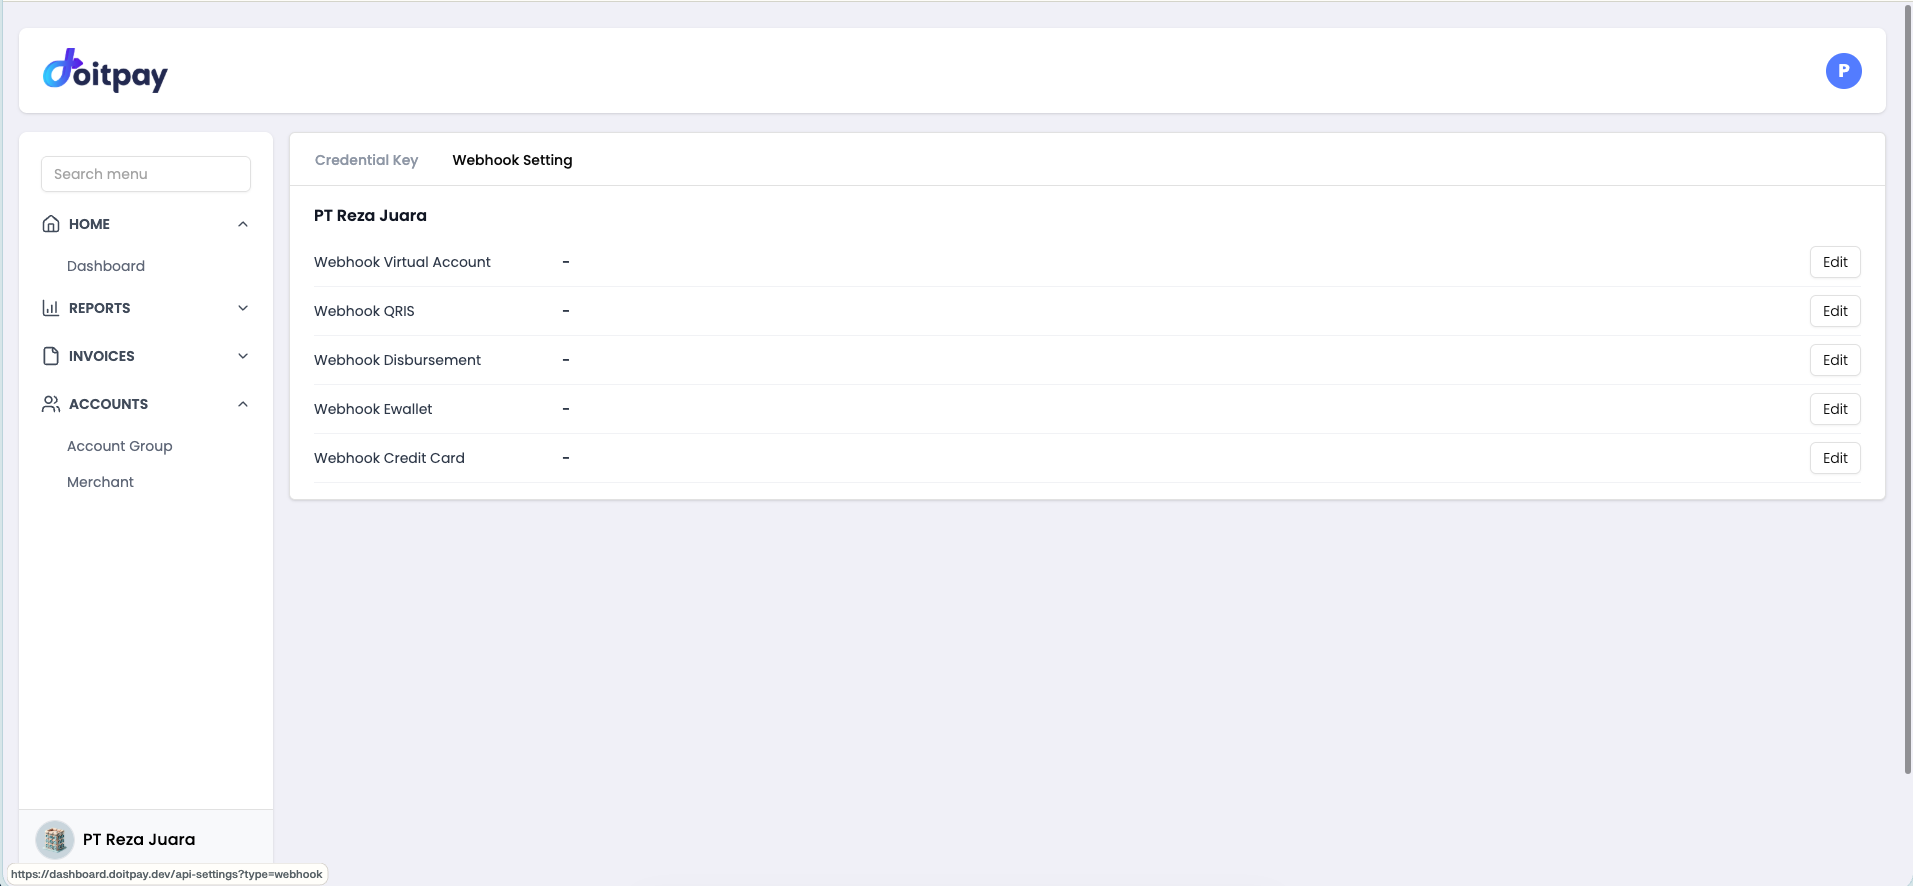
Webhooks allow Doitpay to send real-time notifications to your server when events occur. Configure a URL for each payment channel:
| Webhook | Triggered when |
|---|---|
| Webhook Virtual Account | A VA payment is received |
| Webhook QRIS | A QRIS payment is completed |
| Webhook Disbursement | A disbursement transfer is processed |
| Webhook Ewallet | An e-wallet payment is completed |
| Webhook Credit Card | A credit card payment is completed |
Click Edit next to any webhook to update the URL.